
2.1. Adding project time
2.2. Adding working times and absences
2.3. Editing entries
The Timeline combines working time and project time in one view. This feature gives you an even better overview of your working and project time records and allows you to add or edit times easily.
If you only use one function, i.e., only record working time or only project time, you will also benefit from a more modern and clearer design with this view.
1. Activate the Timeline
As in the apps, it is now also possible to use this feature in the web version. Activate the feature under Administration/Settings/General under "Beta".
After activation, the new menu item "Timeline" appears for each user.
2. Functions
The Timeline displays your own working and project time combined in one view.
Administrators and team leaders also have the option of viewing and editing their team members' entries under Reports/Daily History, see point 3.
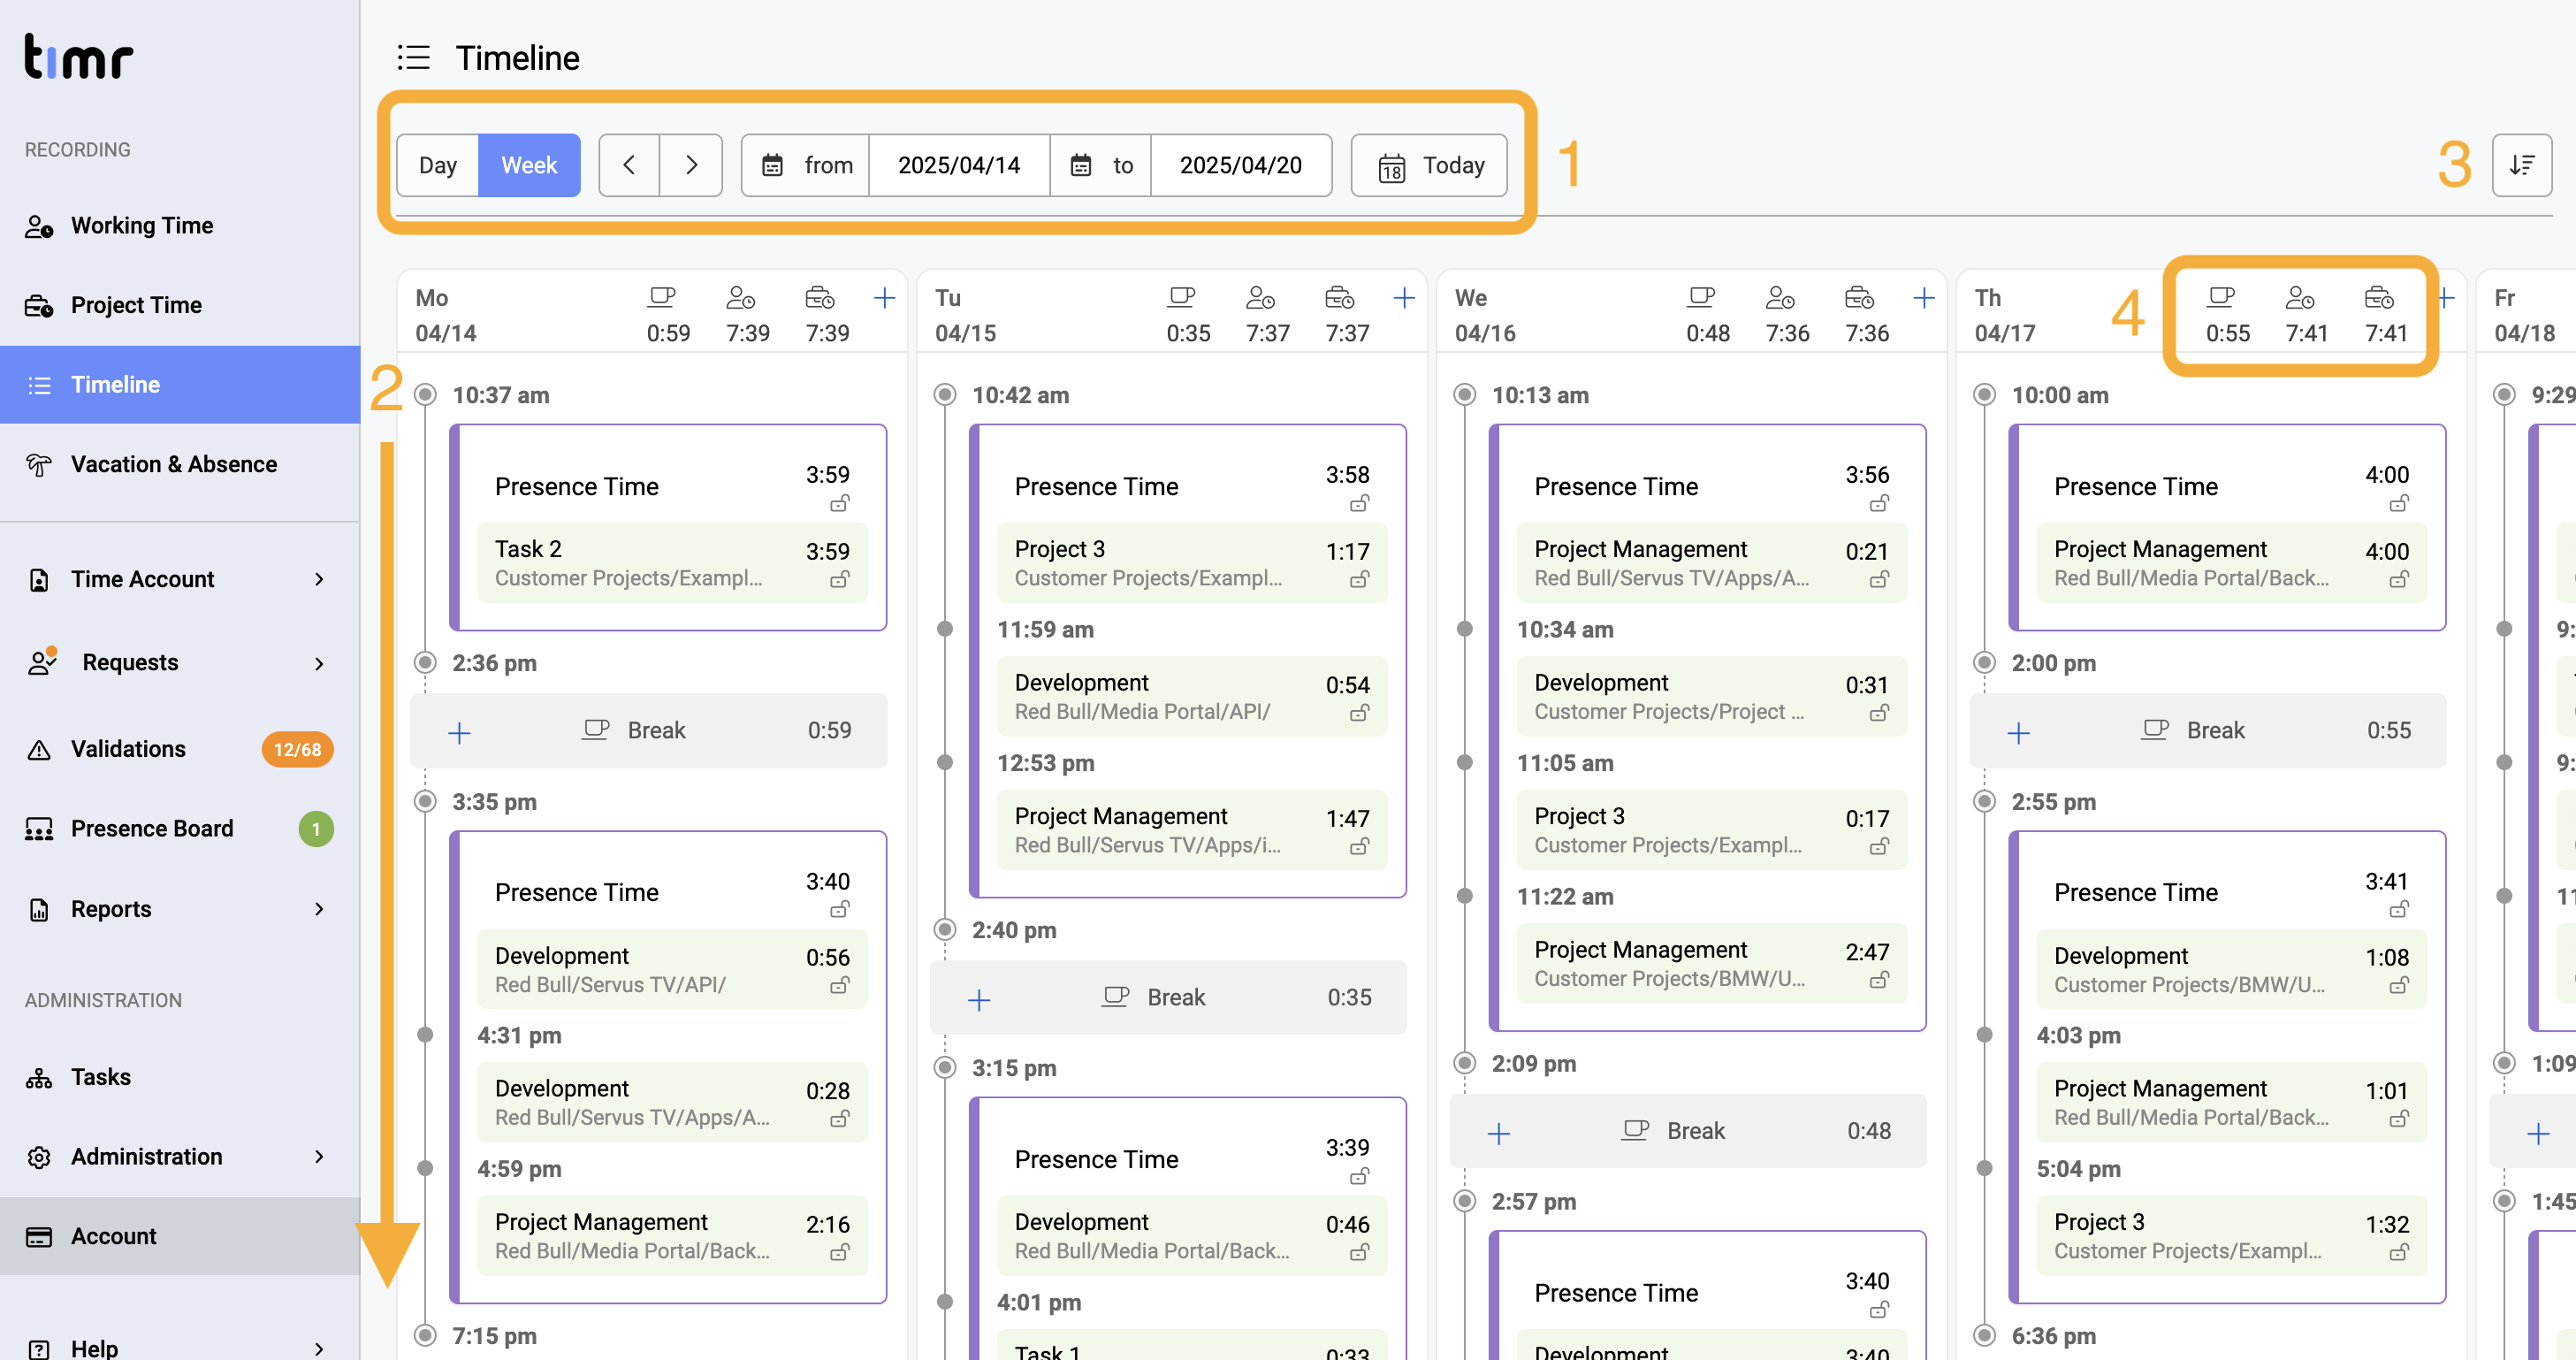
Marker 1: You can switch between the daily and weekly view as well as filter the desired day. With the "Today"-Button you'll always get back to today.
Marker 2: Your own bookings are displayed here chronologically per day.
Marker 3: This button allows you to control how the entries are sorted: either from the earliest entry to the latest or vice versa.
Marker 4: The daily overview shows at a glance how much break time, working time and, if applicable, project time has been entered that day.
2.1 Adding project time
If there is a gap between working time and project time, the project time can be added directly in the timeline.
2.2 Adding or editing working times and absences
It is also possible to add or request working hours and absences using +-Button next to the daily overview.
2.3. Editing entries
To edit an entry, click on the booking to open the detailed information. It can be edited here as long as the status is set to changeable.
3. Daily History
If the Timeline feature is activated, the "Daily History" is also activated under the "Reports" menu.
The daily history view helps you quickly review individual workdays of your team members. You can make corrections and change statuses directly, without switching between different views. This significantly simplifies the preparation of approvals and the monthly time account balance.
Marker 1: Here you can filter the time period and user.
Marker 2: If you click on the attendance time or project time, you can open it directly from the timeline to edit, duplicate or delete it. You can also change the status.
Marker 3: Practical: The validations are displayed directly in the timeline so that you can correct them here.
Marker 4: You can also see whether the entry has been edited (pencil icon) or what the status of the entry is.
Comments
0 comments
Article is closed for comments.