
Contents
2. Immediate time tracking on the smartphone
3. Manually adding working time
7. Configure email notifications
time tracking with timr is focused on tracking your work hours directly while you're at work. To track your time you're using a start-stop system. It's like a digital stopwatch. Of course it's also possible to edit time entries or to enter a record at a later time.
1. Immediate time tracking
Using start-stop for tracking your time has many advantages. You'll have all your work hours recorded immediately and as accurately as possible. This way you can't forget anything and you also don't have to enter records manually after work.
This short video will give you an overview of the most easy way to track your work hours.
2. Immediate time tracking on the smartphone
When you're on the go you can track your time via app on your smartphone. timr apps are available for all platforms. The timr iOS and Android Apps are even offline apps.
In this documentation we'll demonstrate how immediate time tracking is done with the timr iOS app. The general workflow is the same for all timr apps.
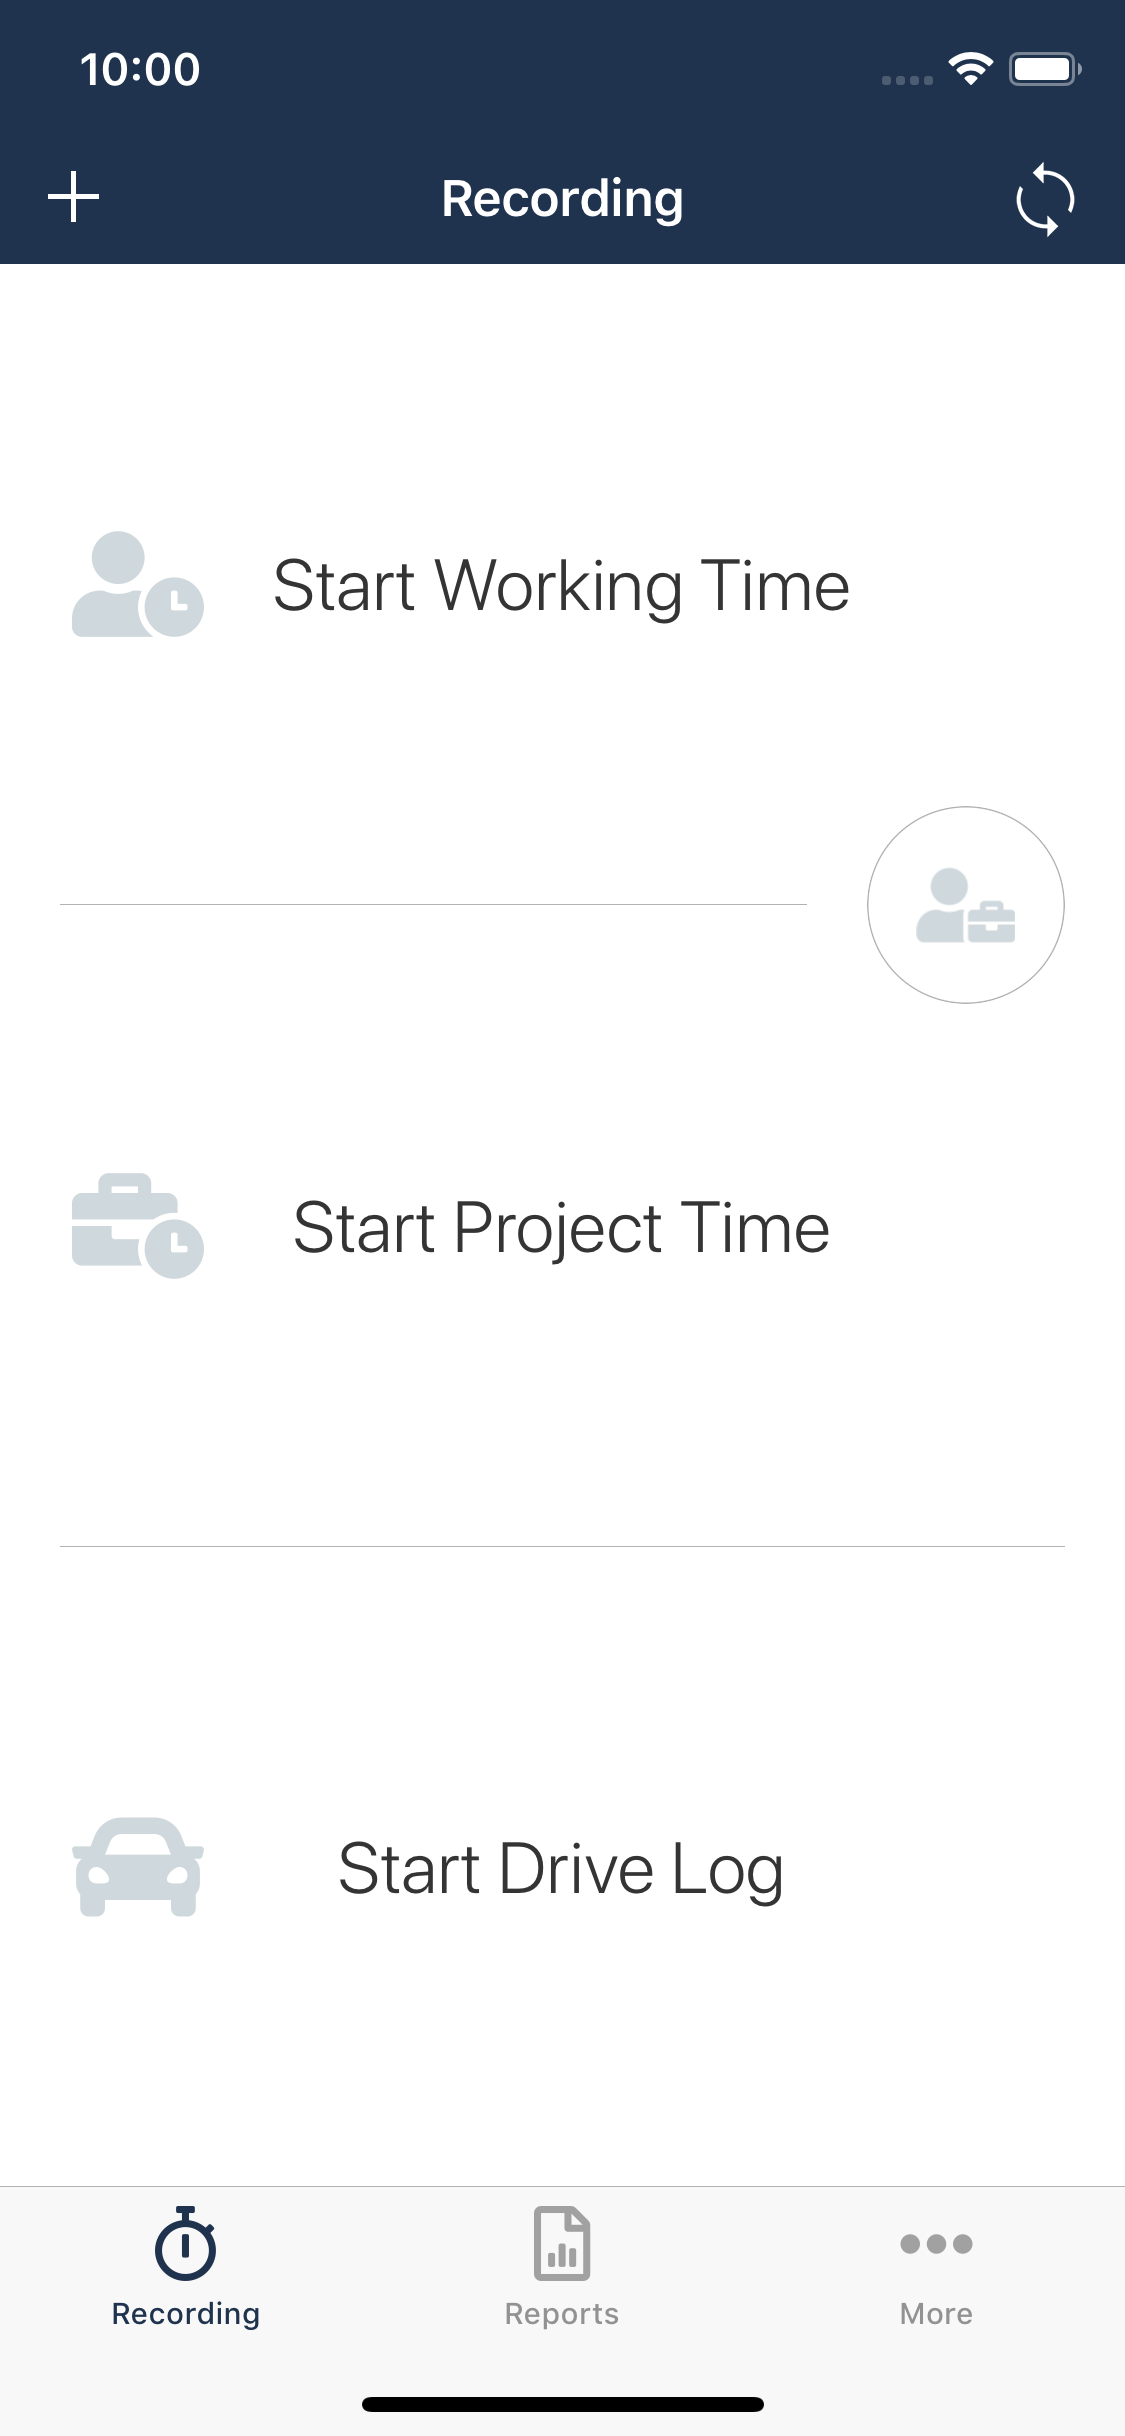
2.1. Start recording
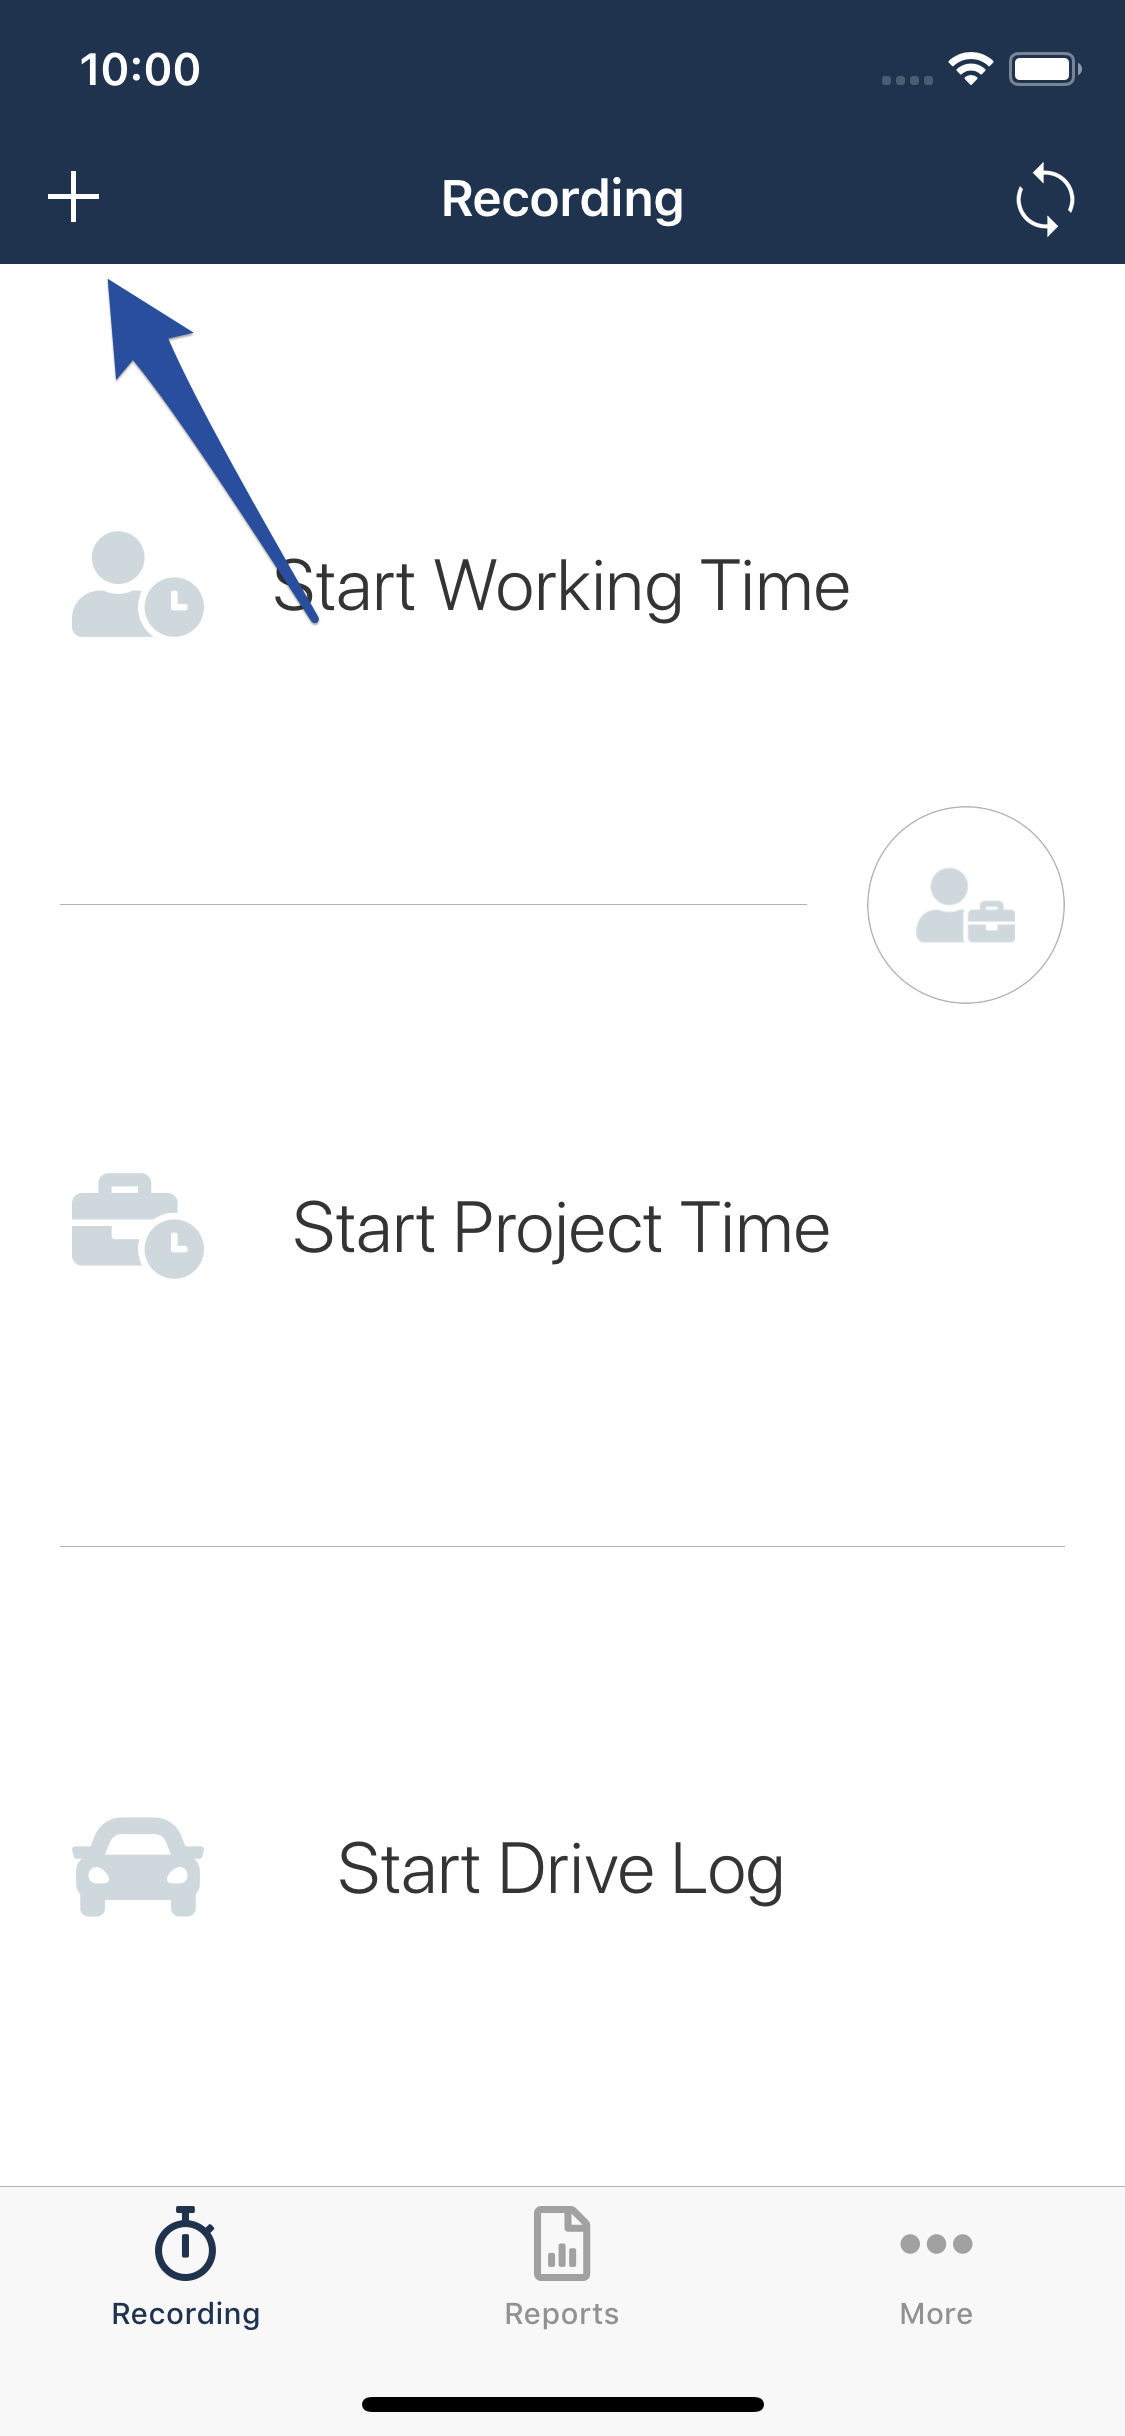
In order to start tracking your work hours just tap on "Start Working Time".
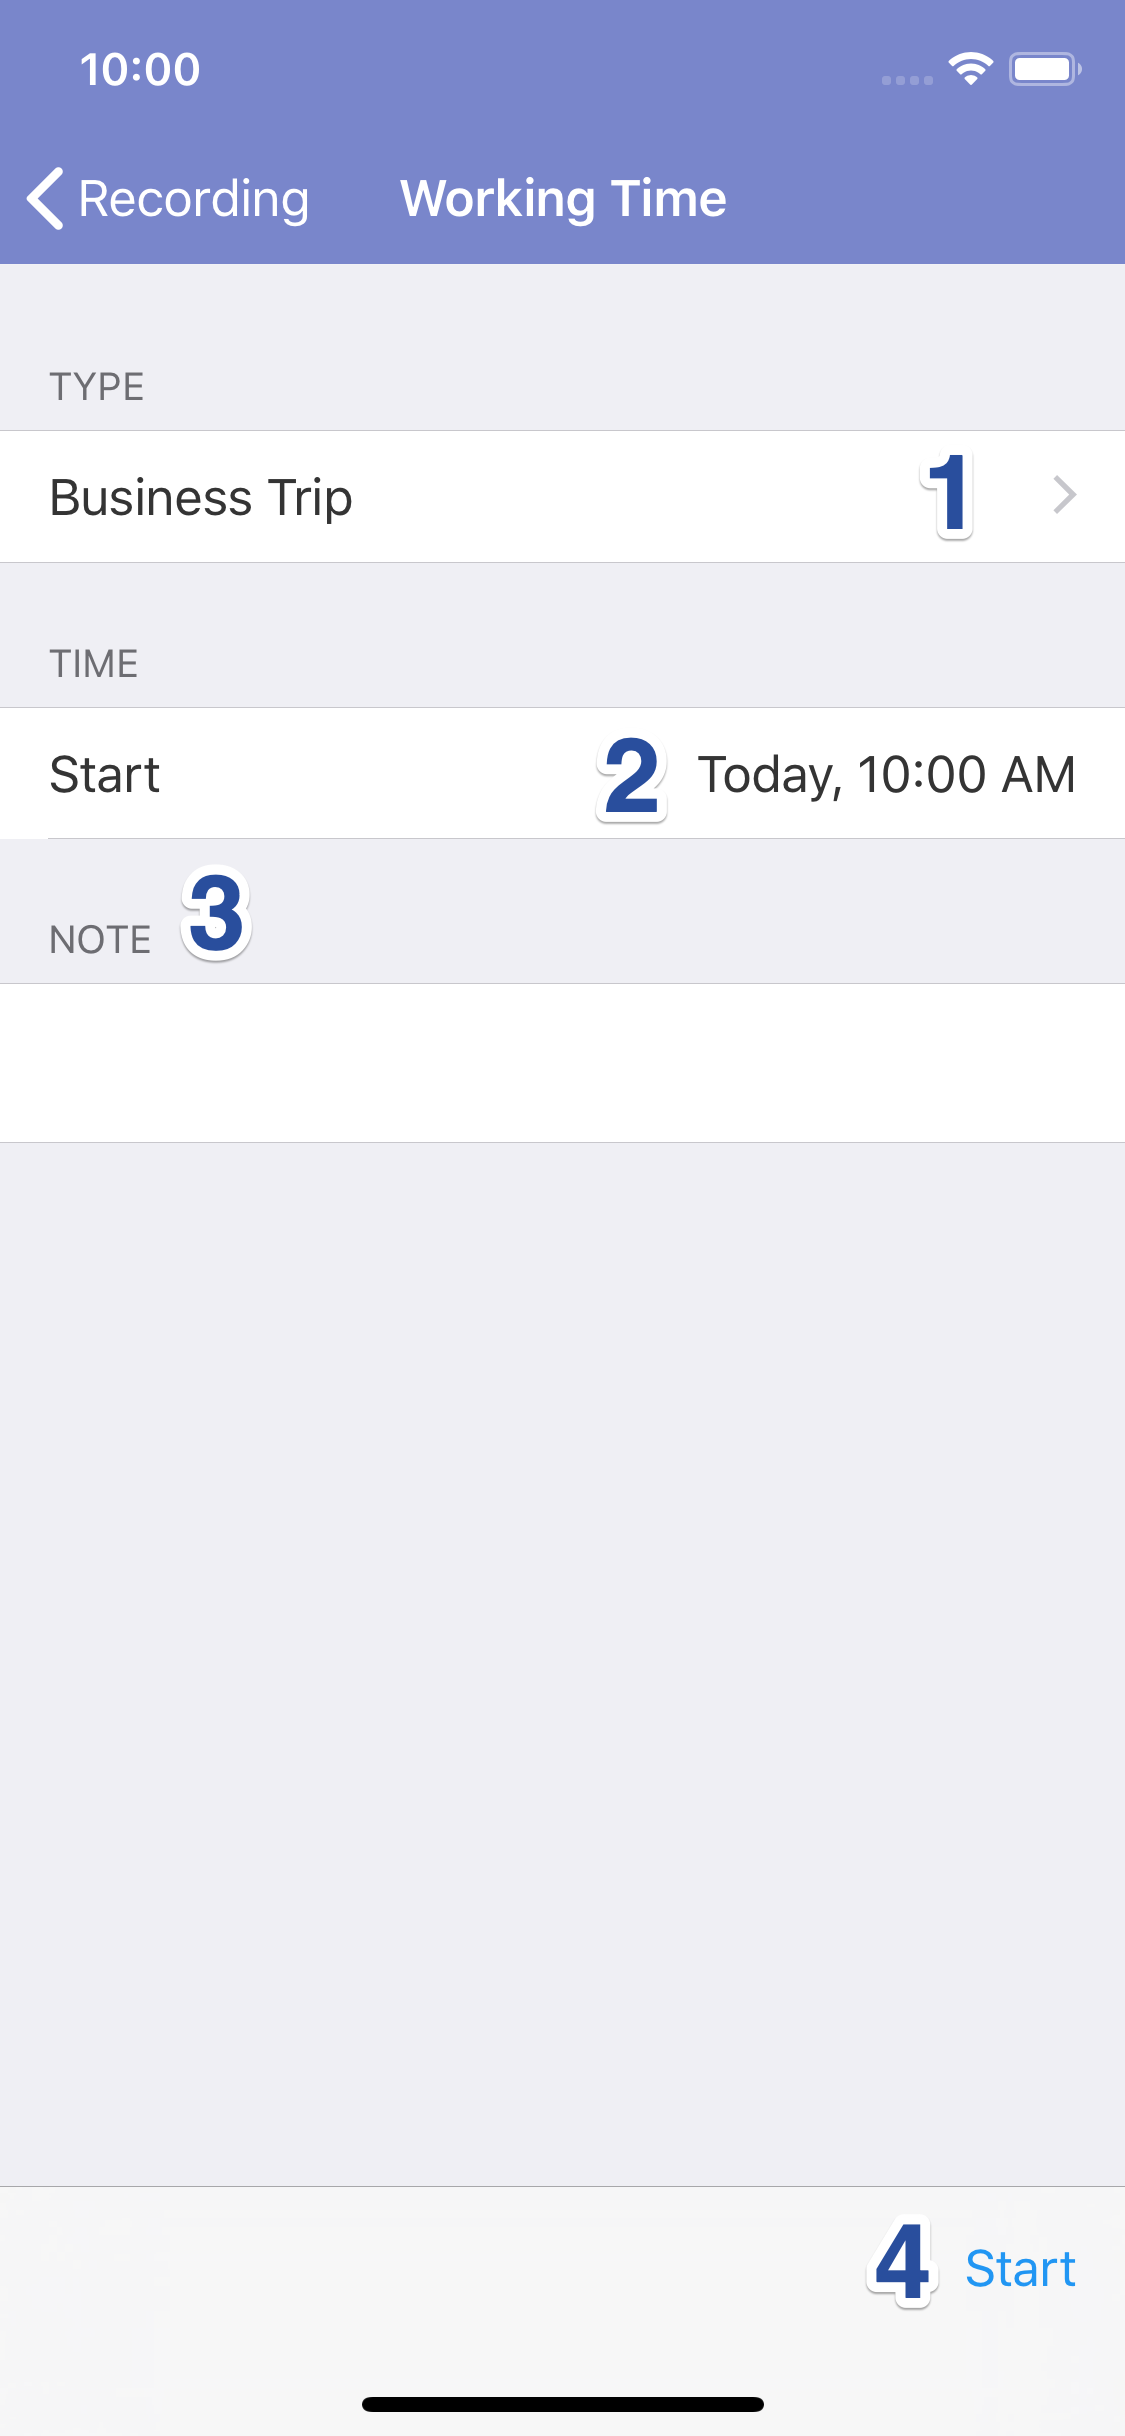
Marker 1: At first you have to select the desired Working Time Type.
Marker 2: If you are authorized to, you can adjust the Start Date and Time. timr automatically suggests the current time.
The good thing is, if you've forgotten to start you can easily start as soon as you've noticed it.
Marker 3: You can add your notes for this Working Time Recording here.
Marker 4: Press "Start" to "punch in" and your Working Time will be tracked.
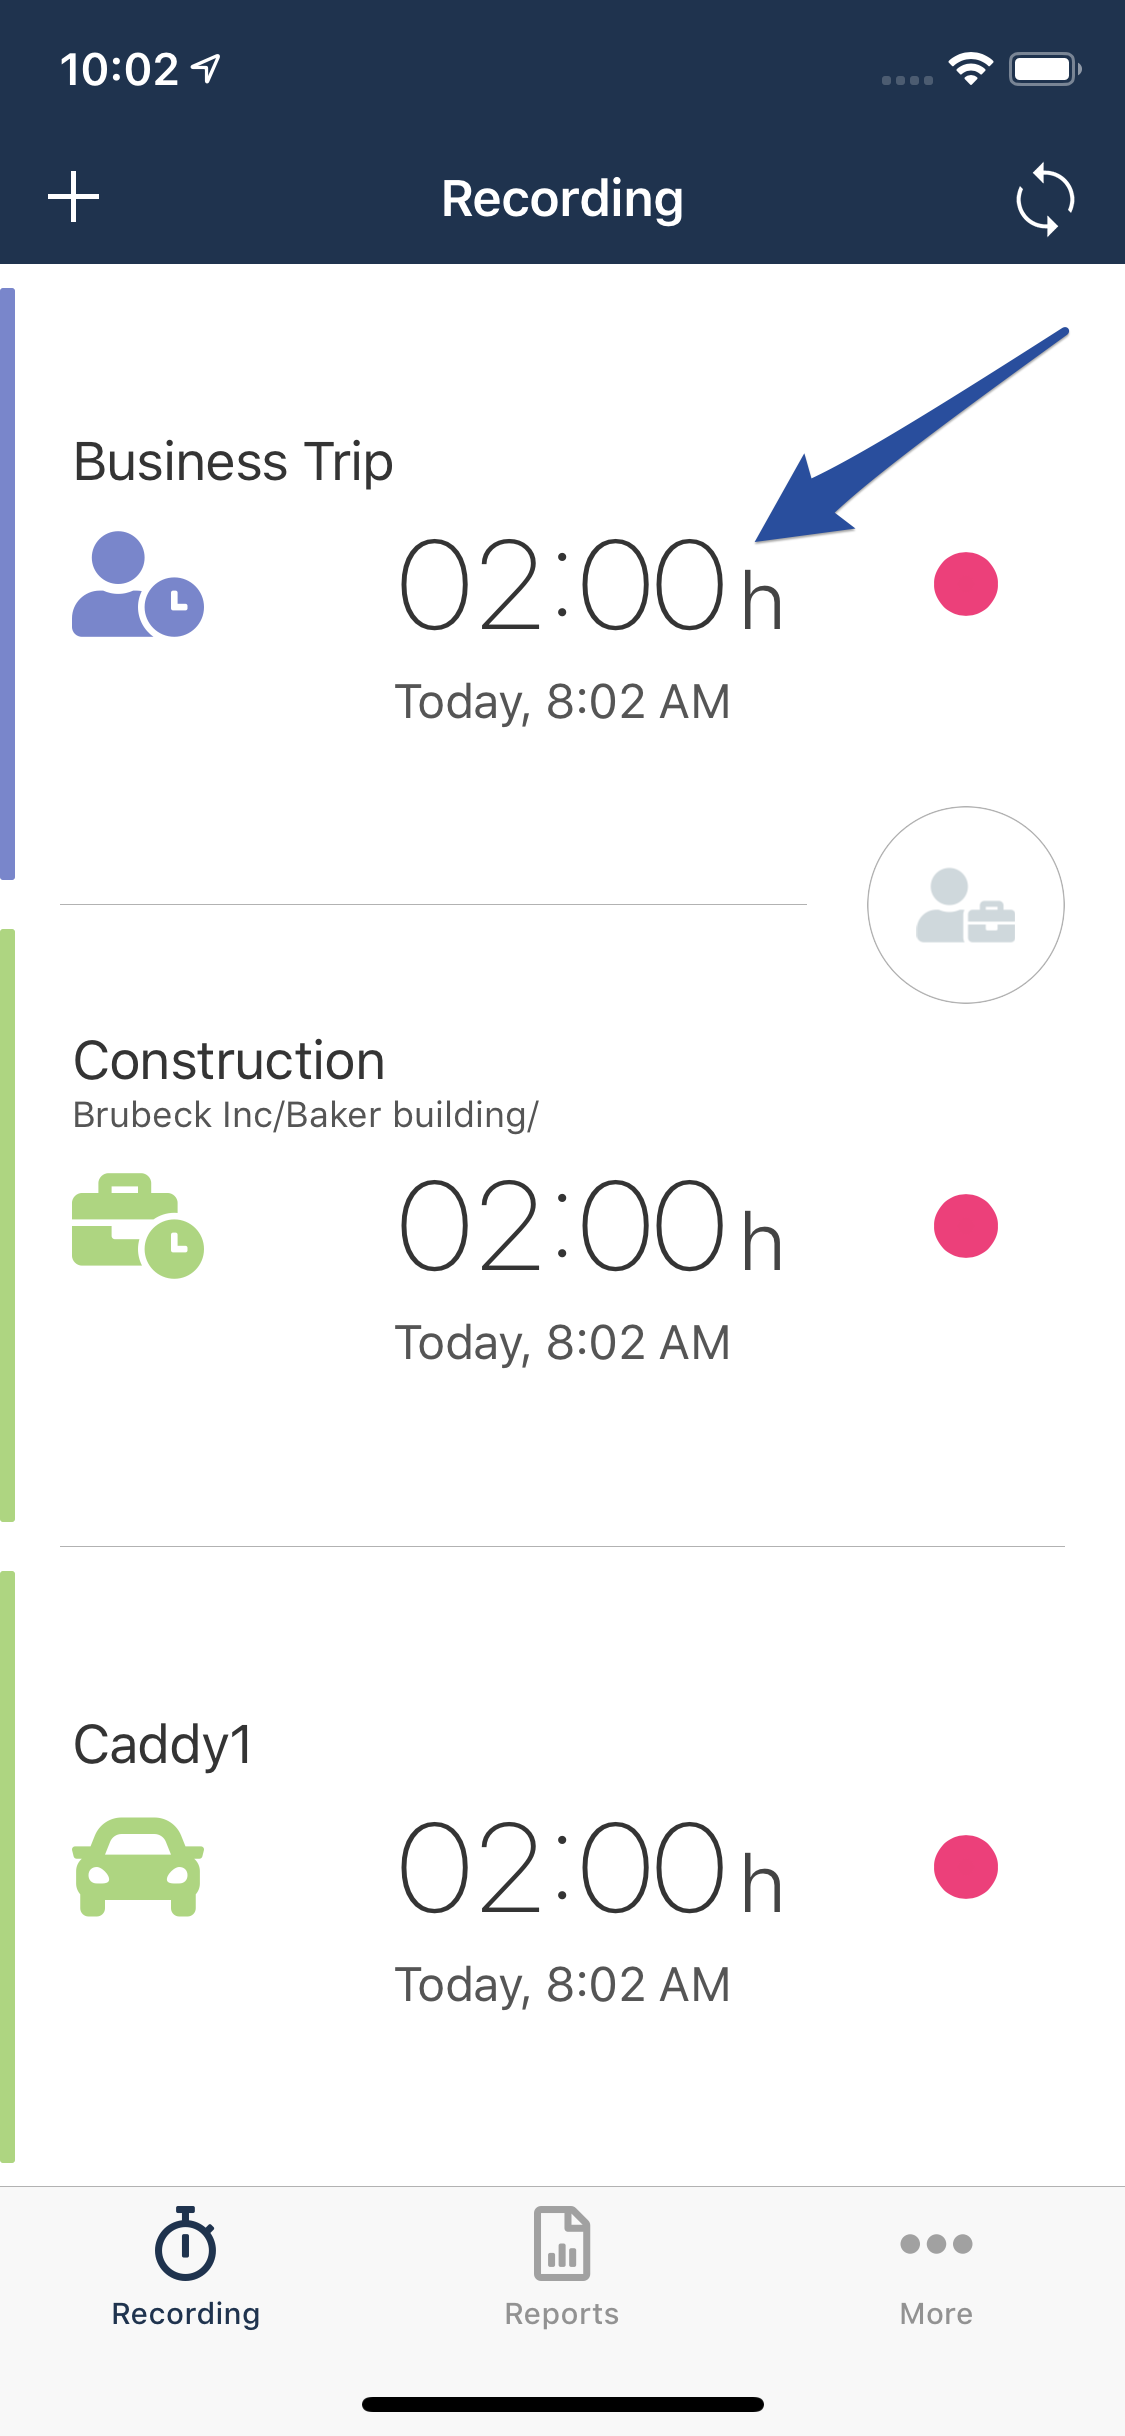
2.2. Stop the recording
This is an example of an active Working Time Recording. To Pause, Stop or Delete this running Working Time Recording you can click on it which opens the "Stop Working Time" dialog.
Before you stop your recording (marker 5) you can take notes or edit the recording.
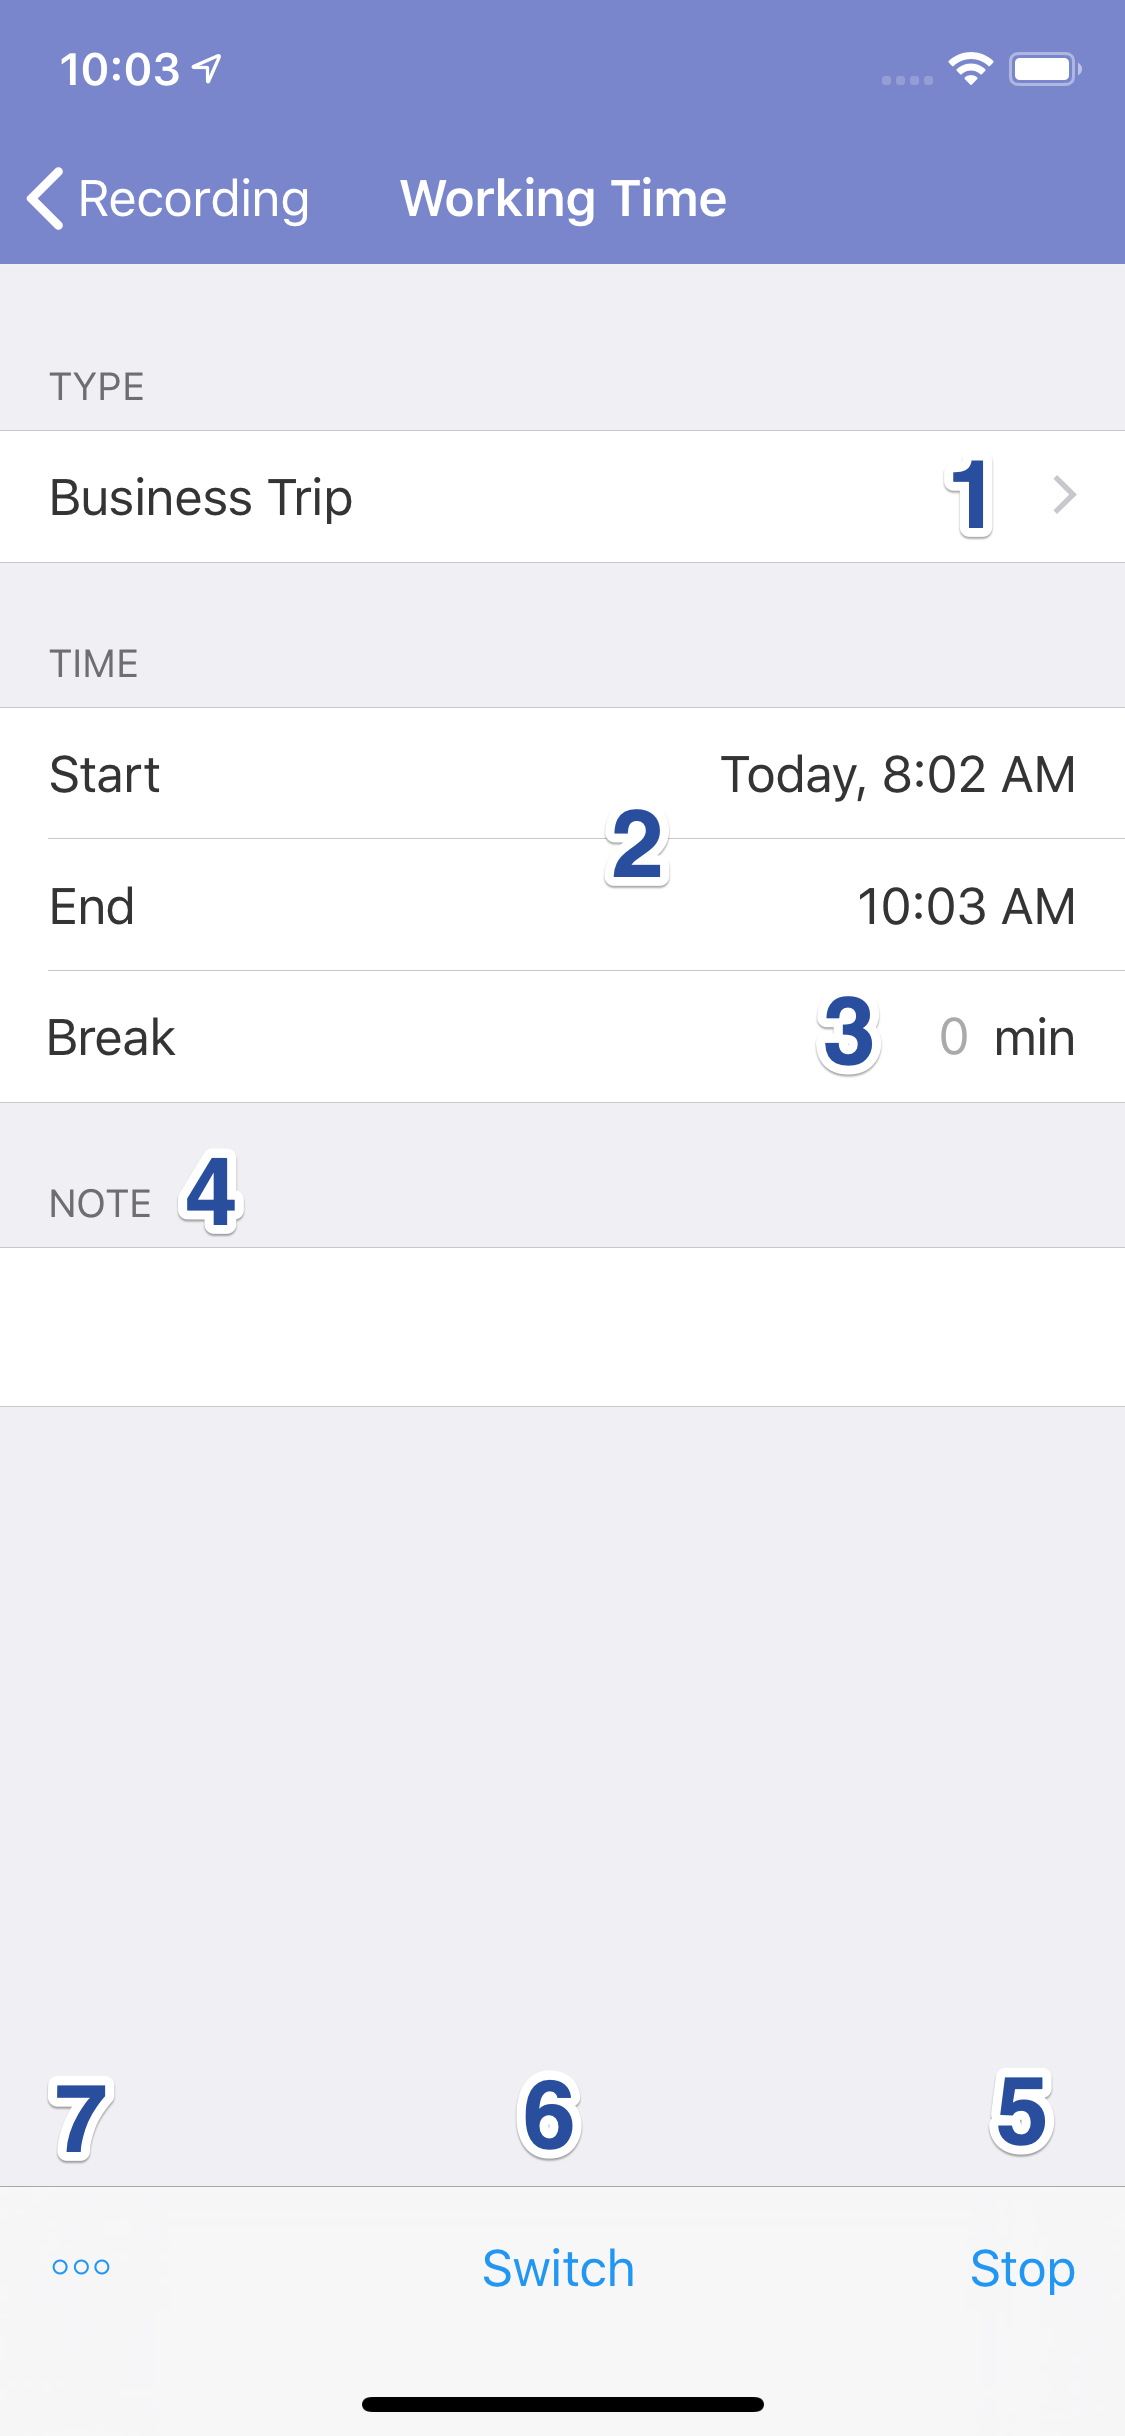
Marker 1: You can change the Working Time Type.
Marker 2: If you are authorized to, you can edit the Start/End Date and Time before you Stop the running recording.
Marker 3: If you are authorized to, you can edit the break time. For example: You've forgotten to pause during the day and so you can insert your break time now.
Marker 4: You can add a note if you want.
Marker 6: You can switch time tracking to another Working Time Type here.
Marker 7: If you'd like to skip this Working Time recording, you can Delete the entire entry.
Furthermore, if you have permission, you can pause your recording manually. If you don't have the "Pause" button then the settings for your timr Account don't allow manual breaks.
3. Manually adding working time
In case you forgot to track your time, you can also manually add time entries at a later time.
3.1. Manually adding working time in the web app
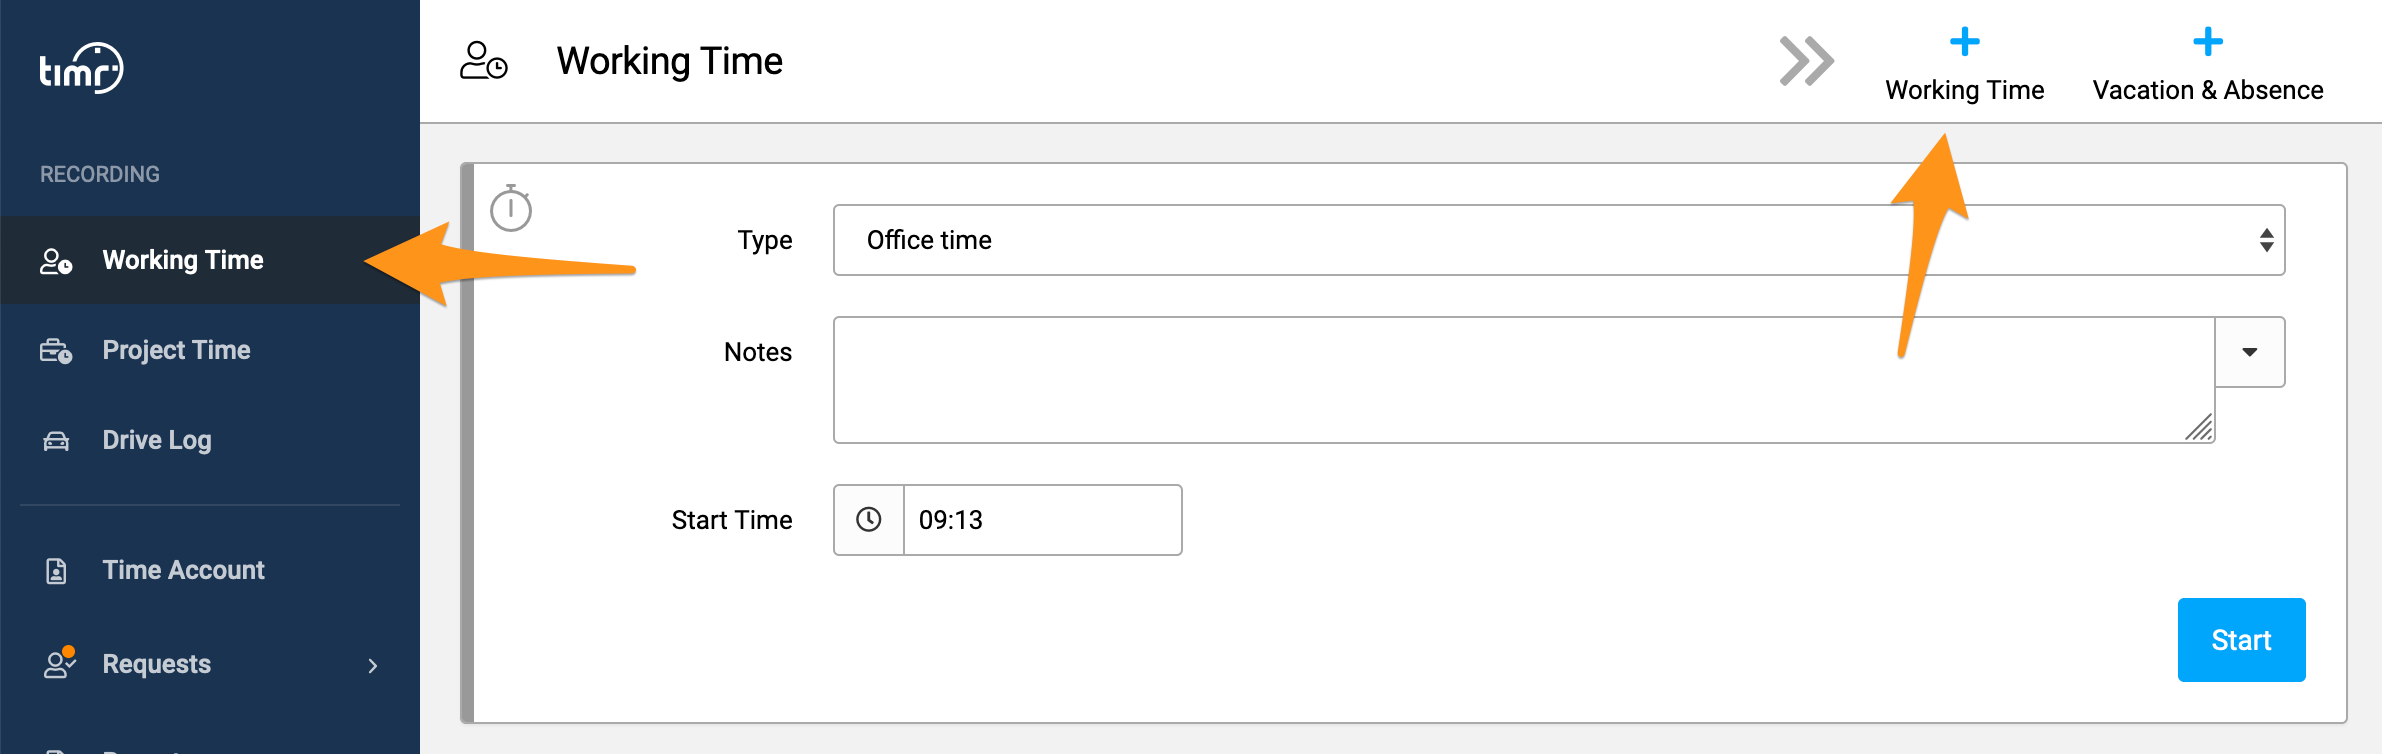
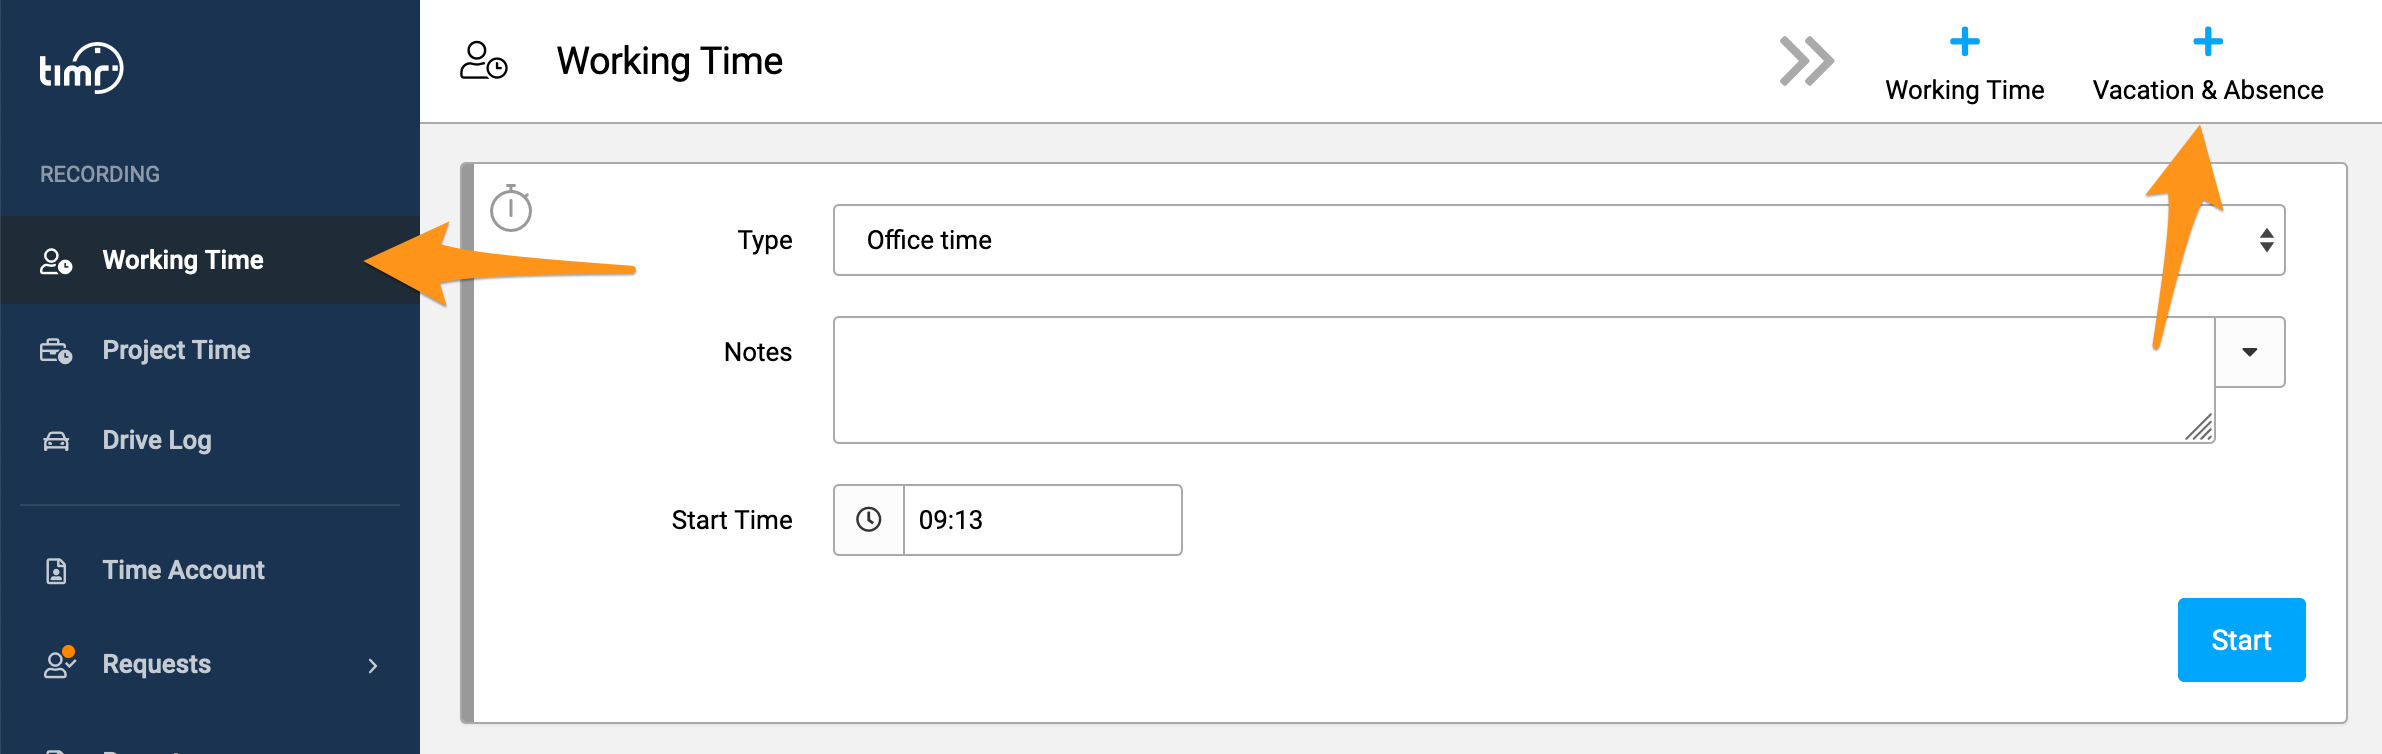
In order to add working time manually, go to "Recording/Working Time" and click on "+ Working Time” on the top right side.
Select the desired working time type (Marker 1) and create a note (Marker 2) for this working time entry. timr always automatically suggests 30 minutes.The Start/End Date and the Start Time are always the End Date and End Time of the last recorded working time entry. You can edit the date and time (Marker 3) as you wish, the duration (Marker 5) will be automatically adjusted. Enter a break (Marker 4)and press "Save" (Marker 6).
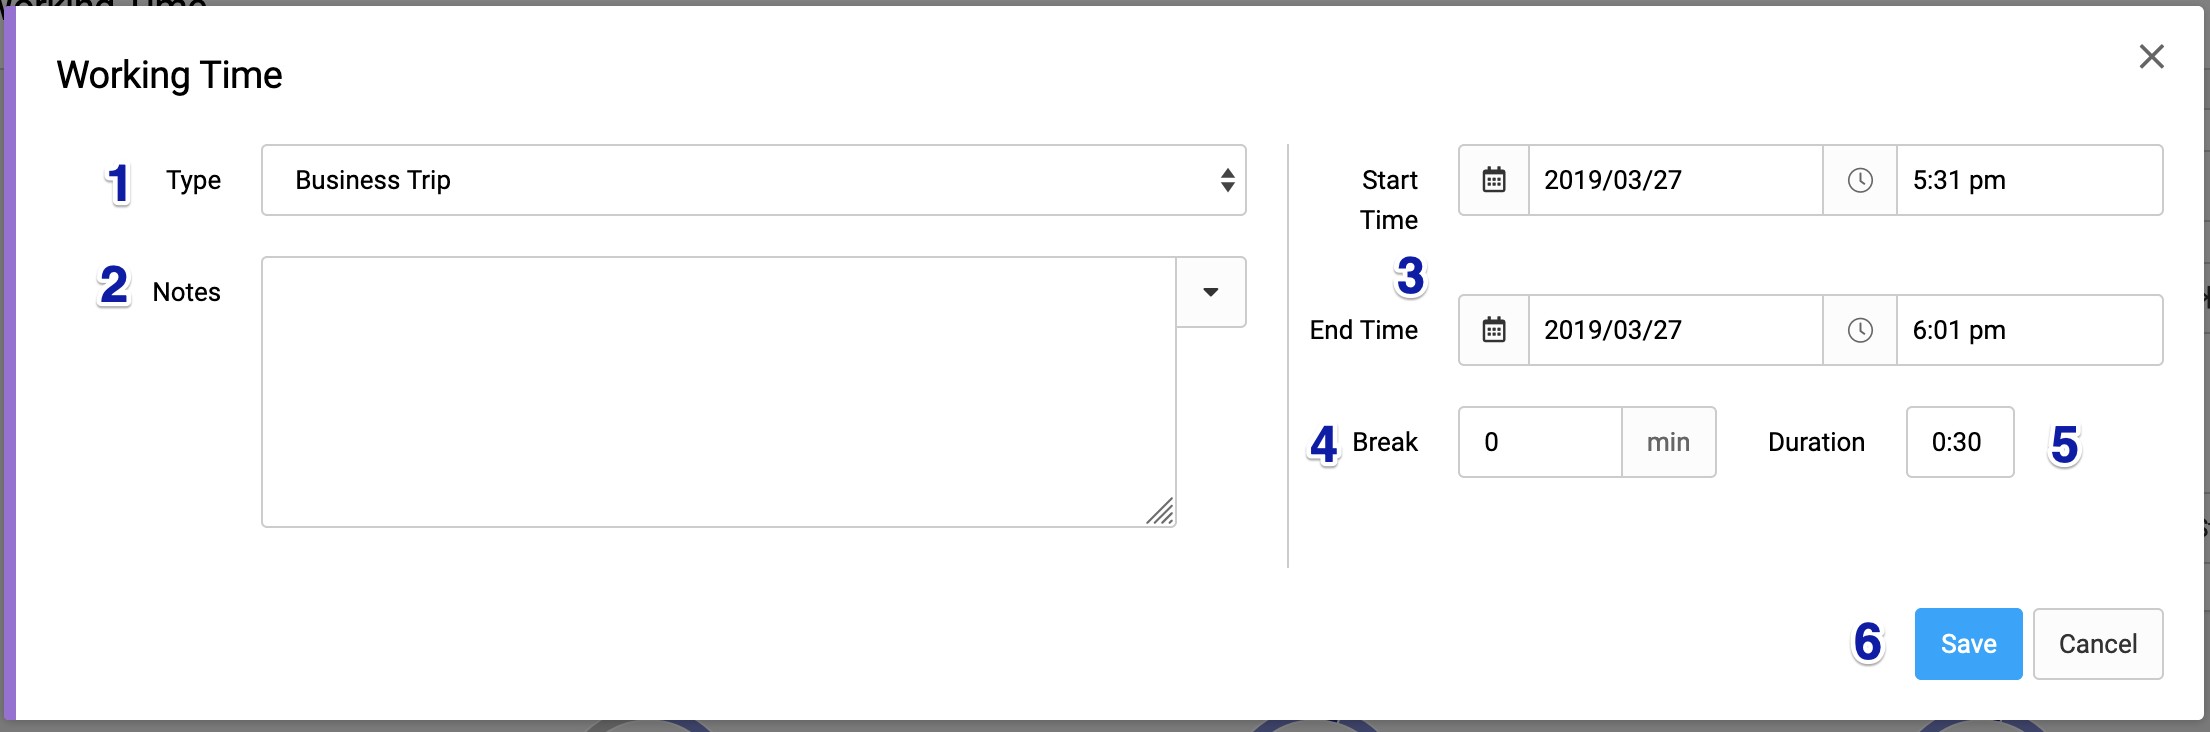
You can enter the time format and duration in almost any form, you will find all the related details in the article about adding time and duration.
3.2. Manually adding working time in the timr app
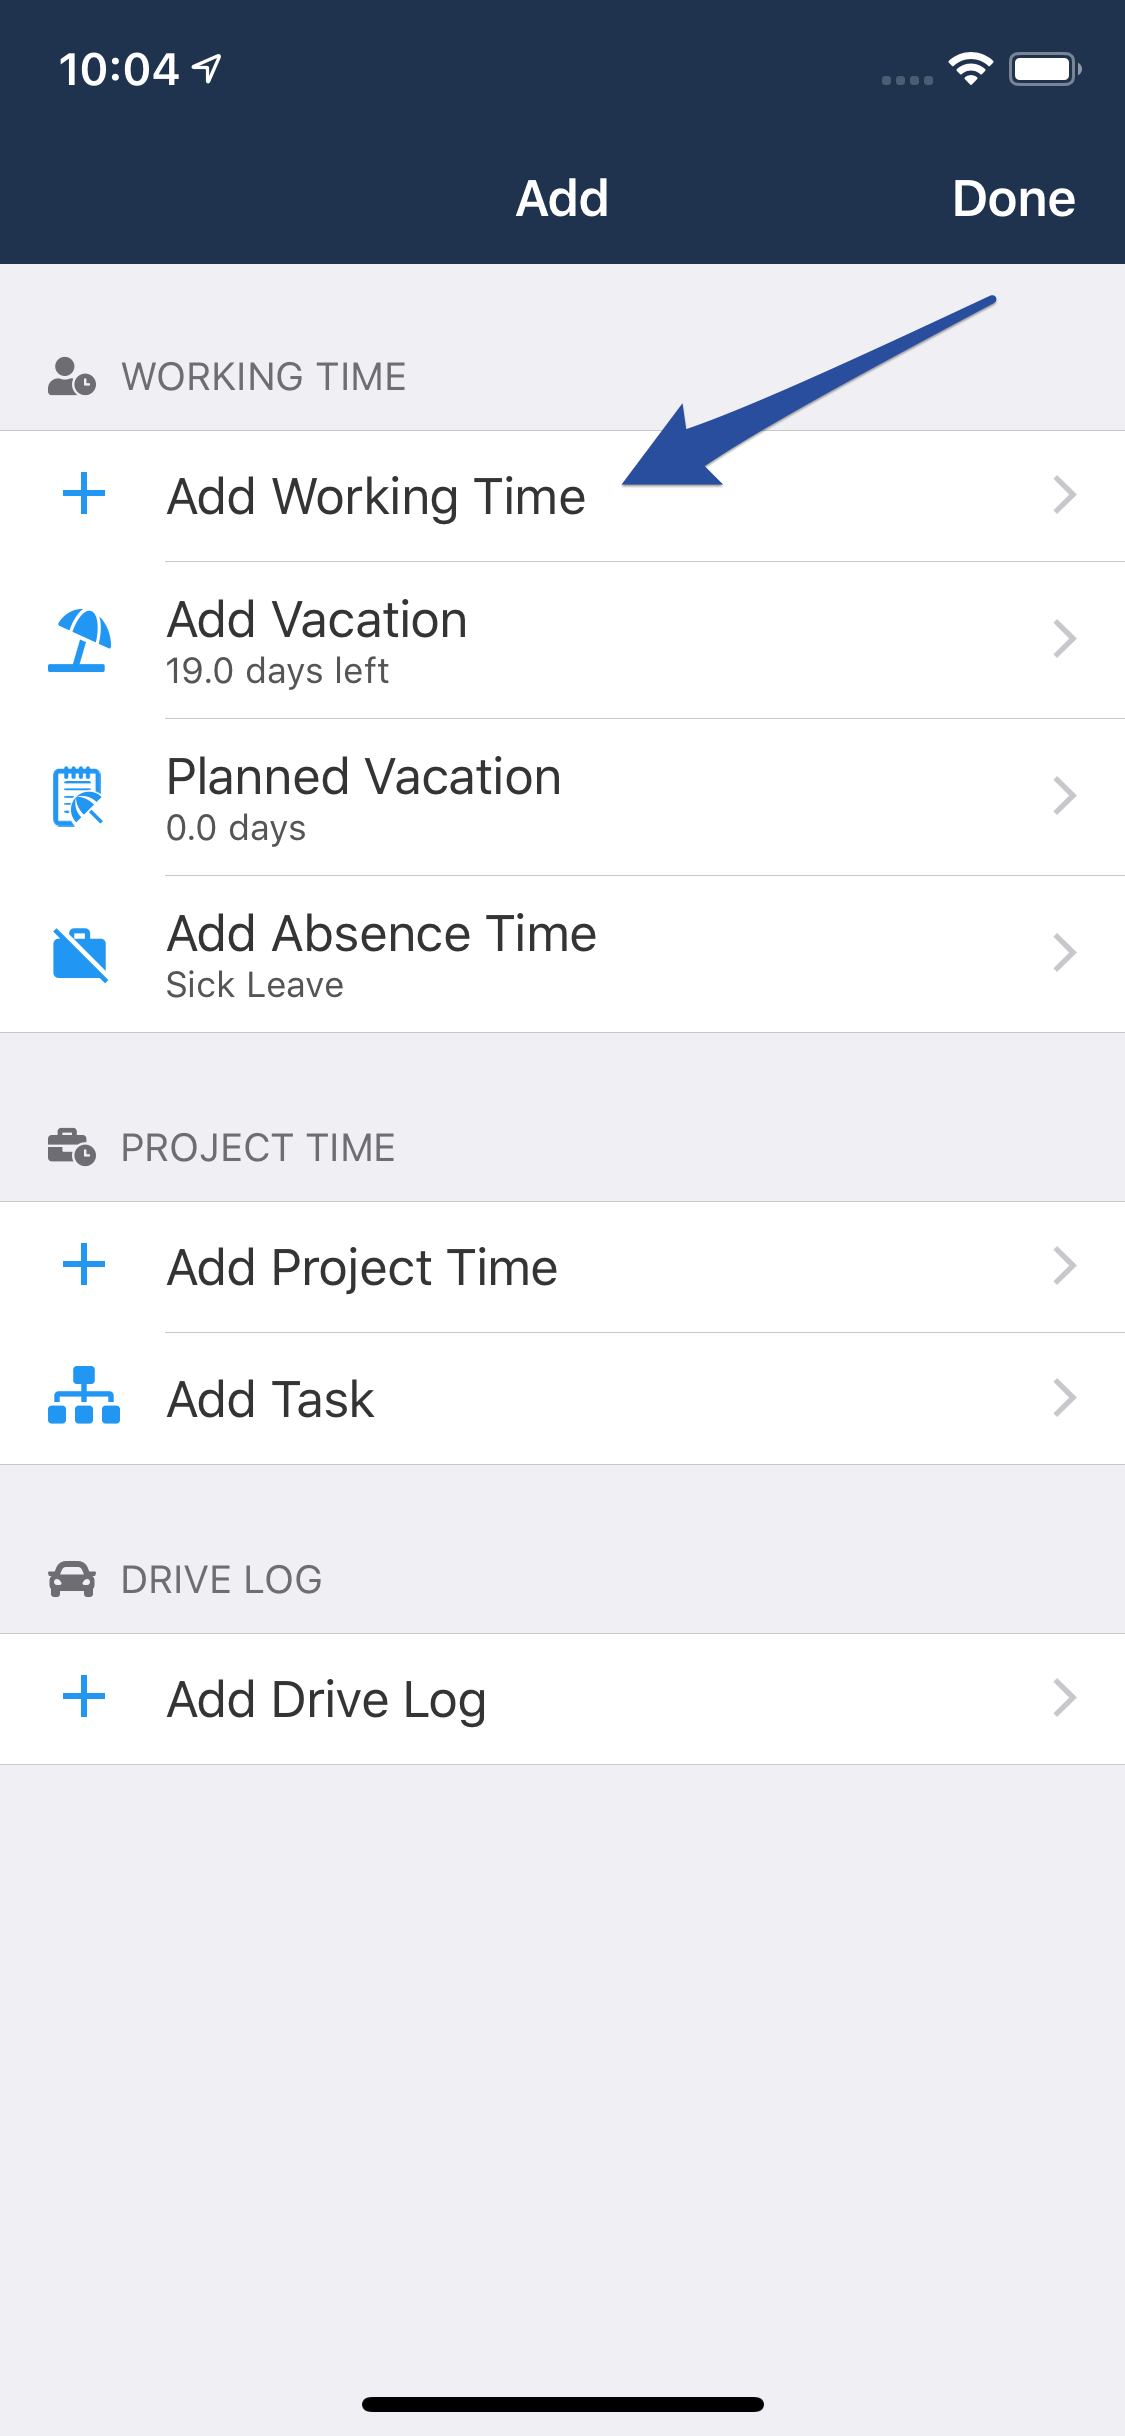
In the timr App you can add records later on, if you have the permission to do this. You can do this via the + symbol in the recording menus. If, for example, you've forgotten to book office time you can do this at a later time.
4. Edit time entries
It's possible to edit time entries if you have the right to do this. You'll find further info in our documentation about editing working time entries.
5. Recording time off
In timr you can also track your time off, like vacation, sicke leave or comp leave. Just enter the recordings menu and use "+ Vacation & Absence".
Note: Time off can only be tracked as defined by the working time type. For example, if the working time type "vacation" is configured to be tracked in days, then you can only track vacation days, but no half days.
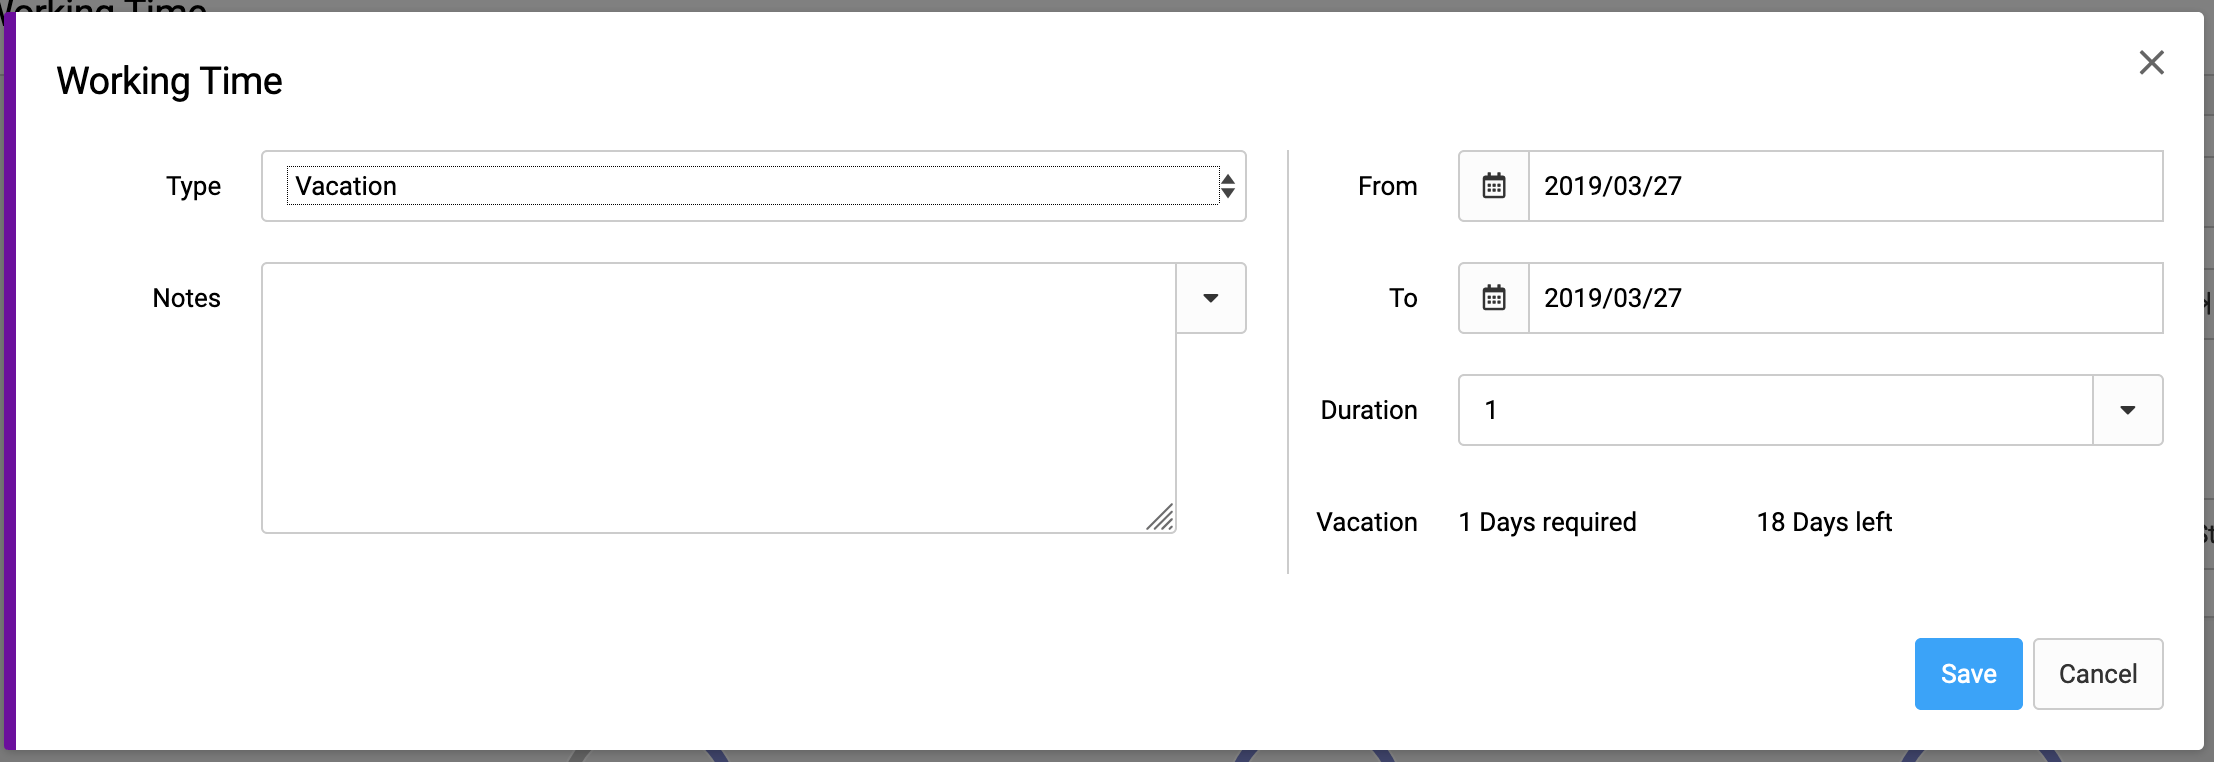
It's also possible to enter a planned vacation. If, for example, you want to record 2 weeks of planned vacation just choose the start and the end date. timr automatically calculates how many days of your holiday entitlement you'll need.
Note: timr also offers request features for leave and absence management. Here you will find further info.
6. Time account infos
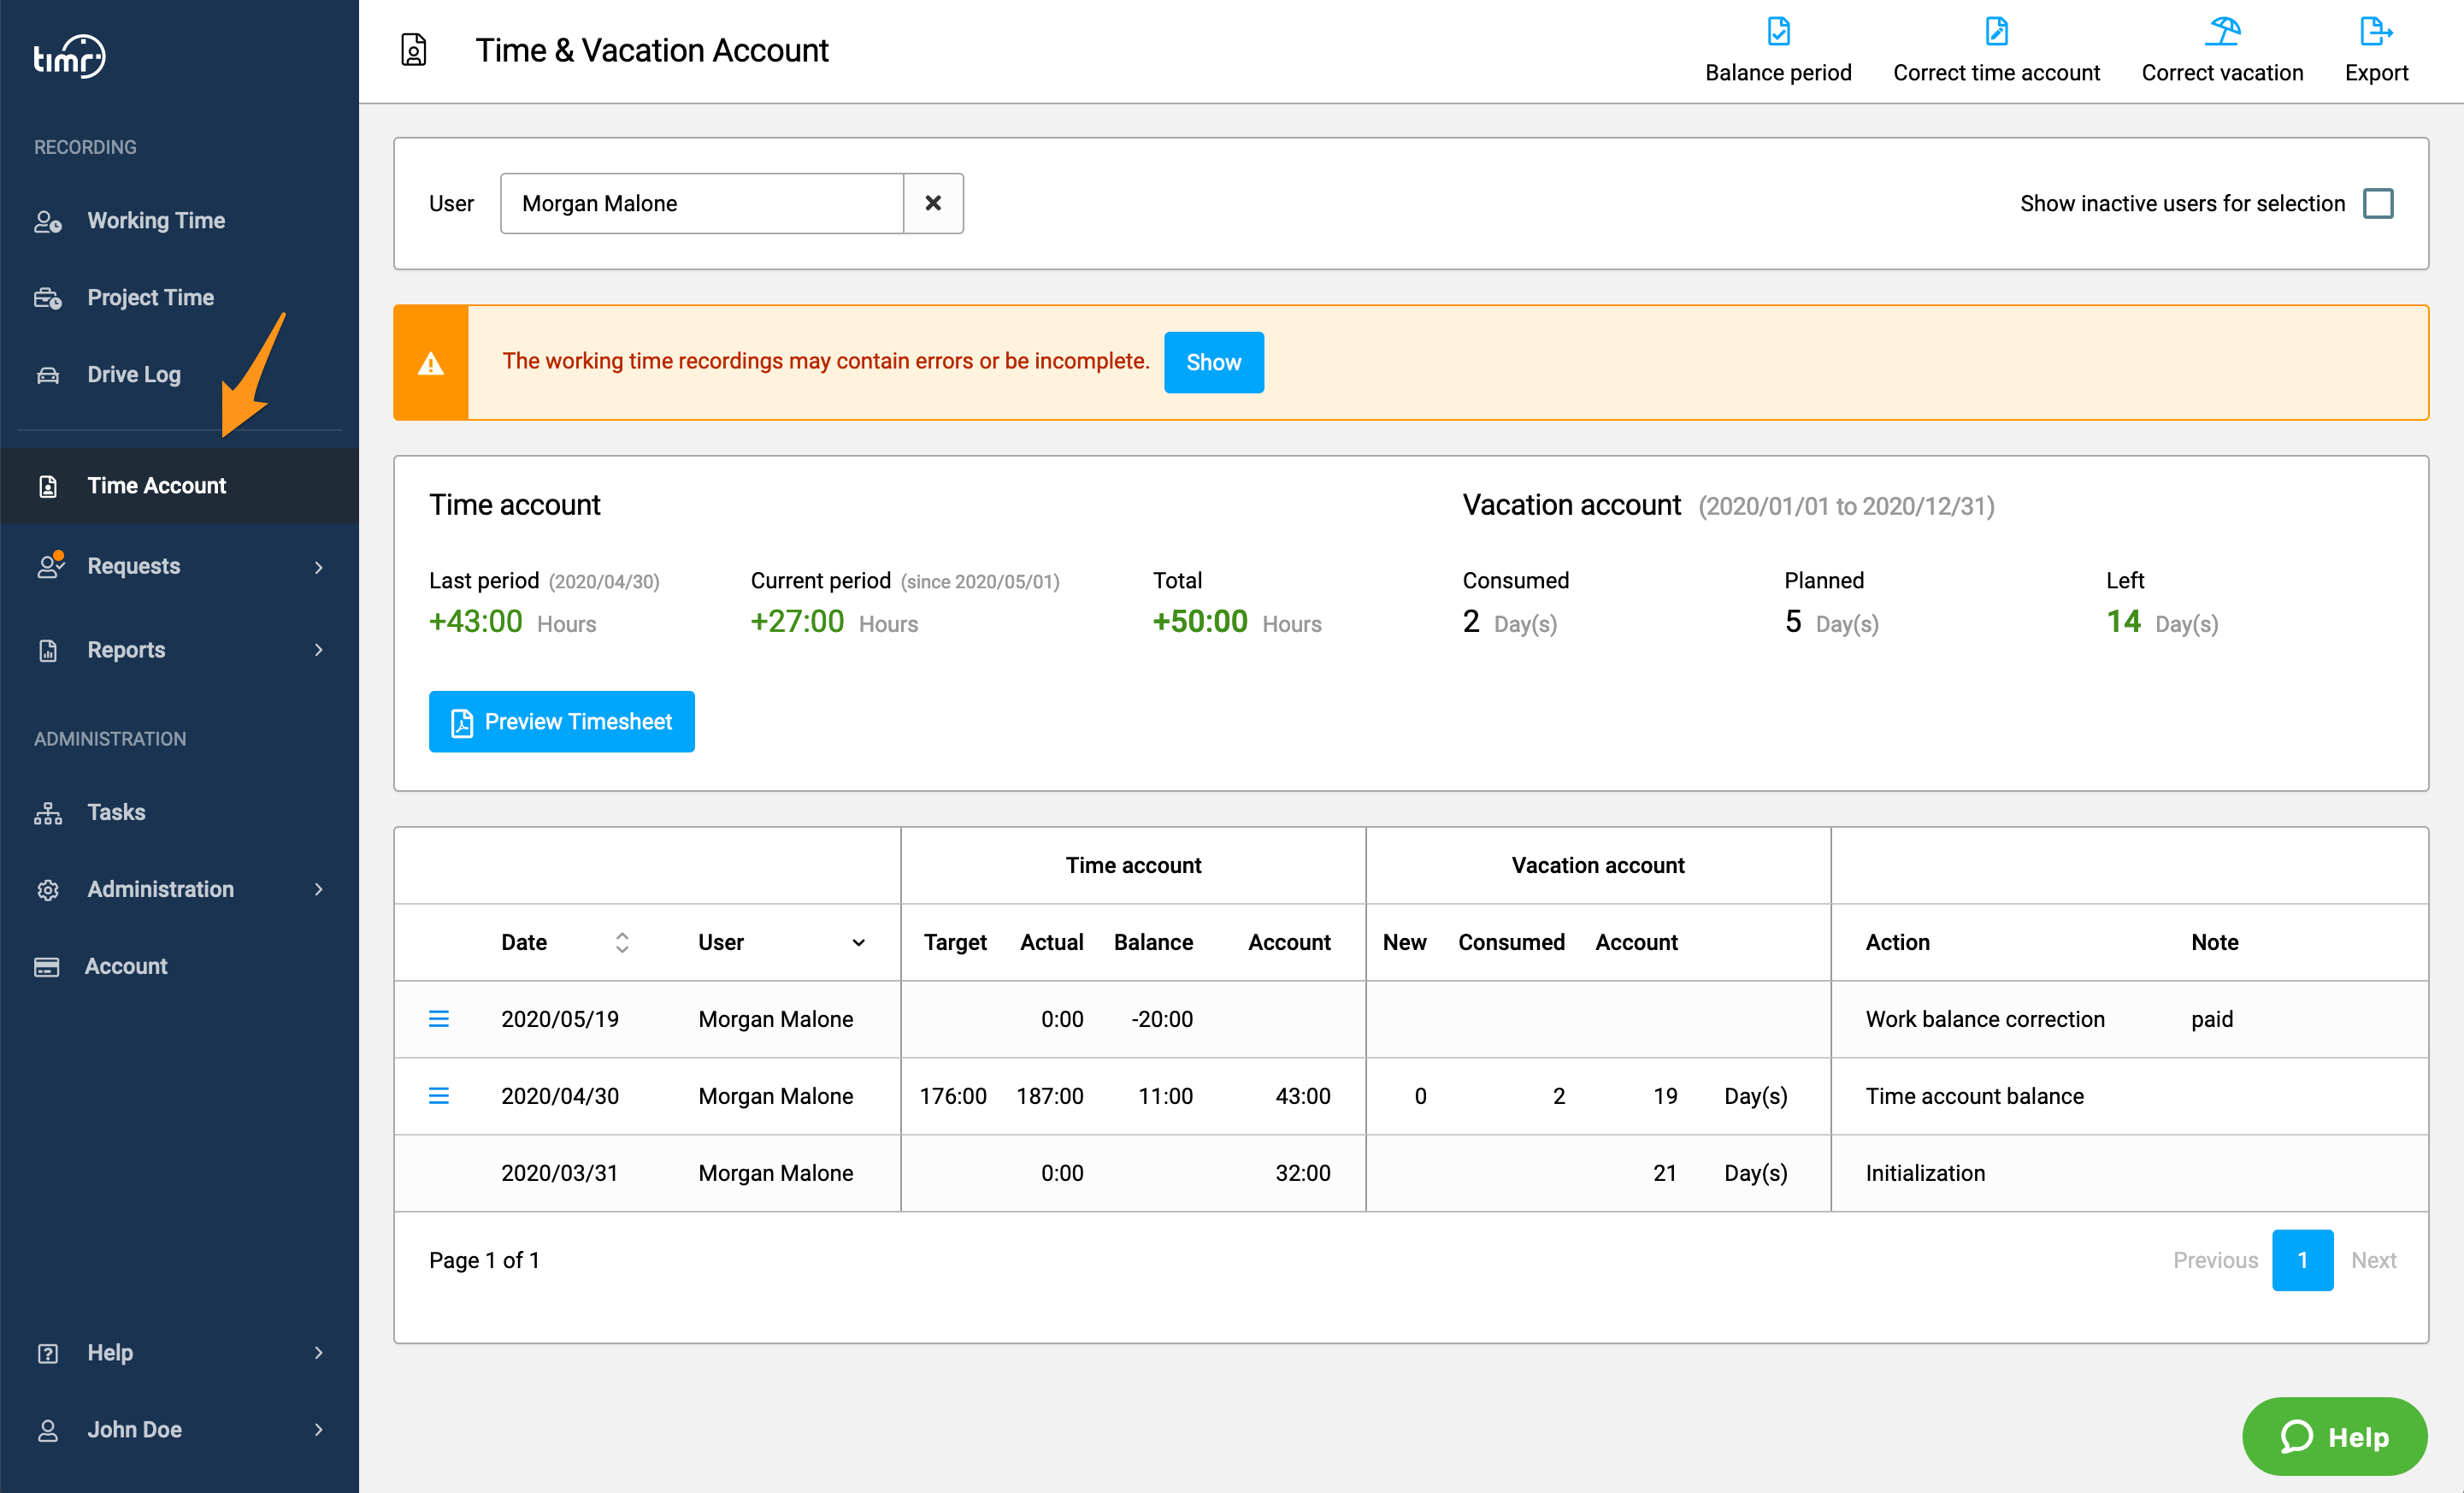
At any time you can take a look at your work hours and vacation account. For this go to the "Time Account".
On the top left side you have all info about your work hours balance, next to it you'll find your vacation account standings.
It's also possible to create a preview of your time sheet any time.
7. Configure email notifications
You can setup an email notification which users will get if their timr is still running after a certain time. To do this enter your personal settings menu.

Comments
0 comments
Article is closed for comments.