
1. Add a car
You can add your cars in timr. Just click in the tab "Cars" on the button "Add car".
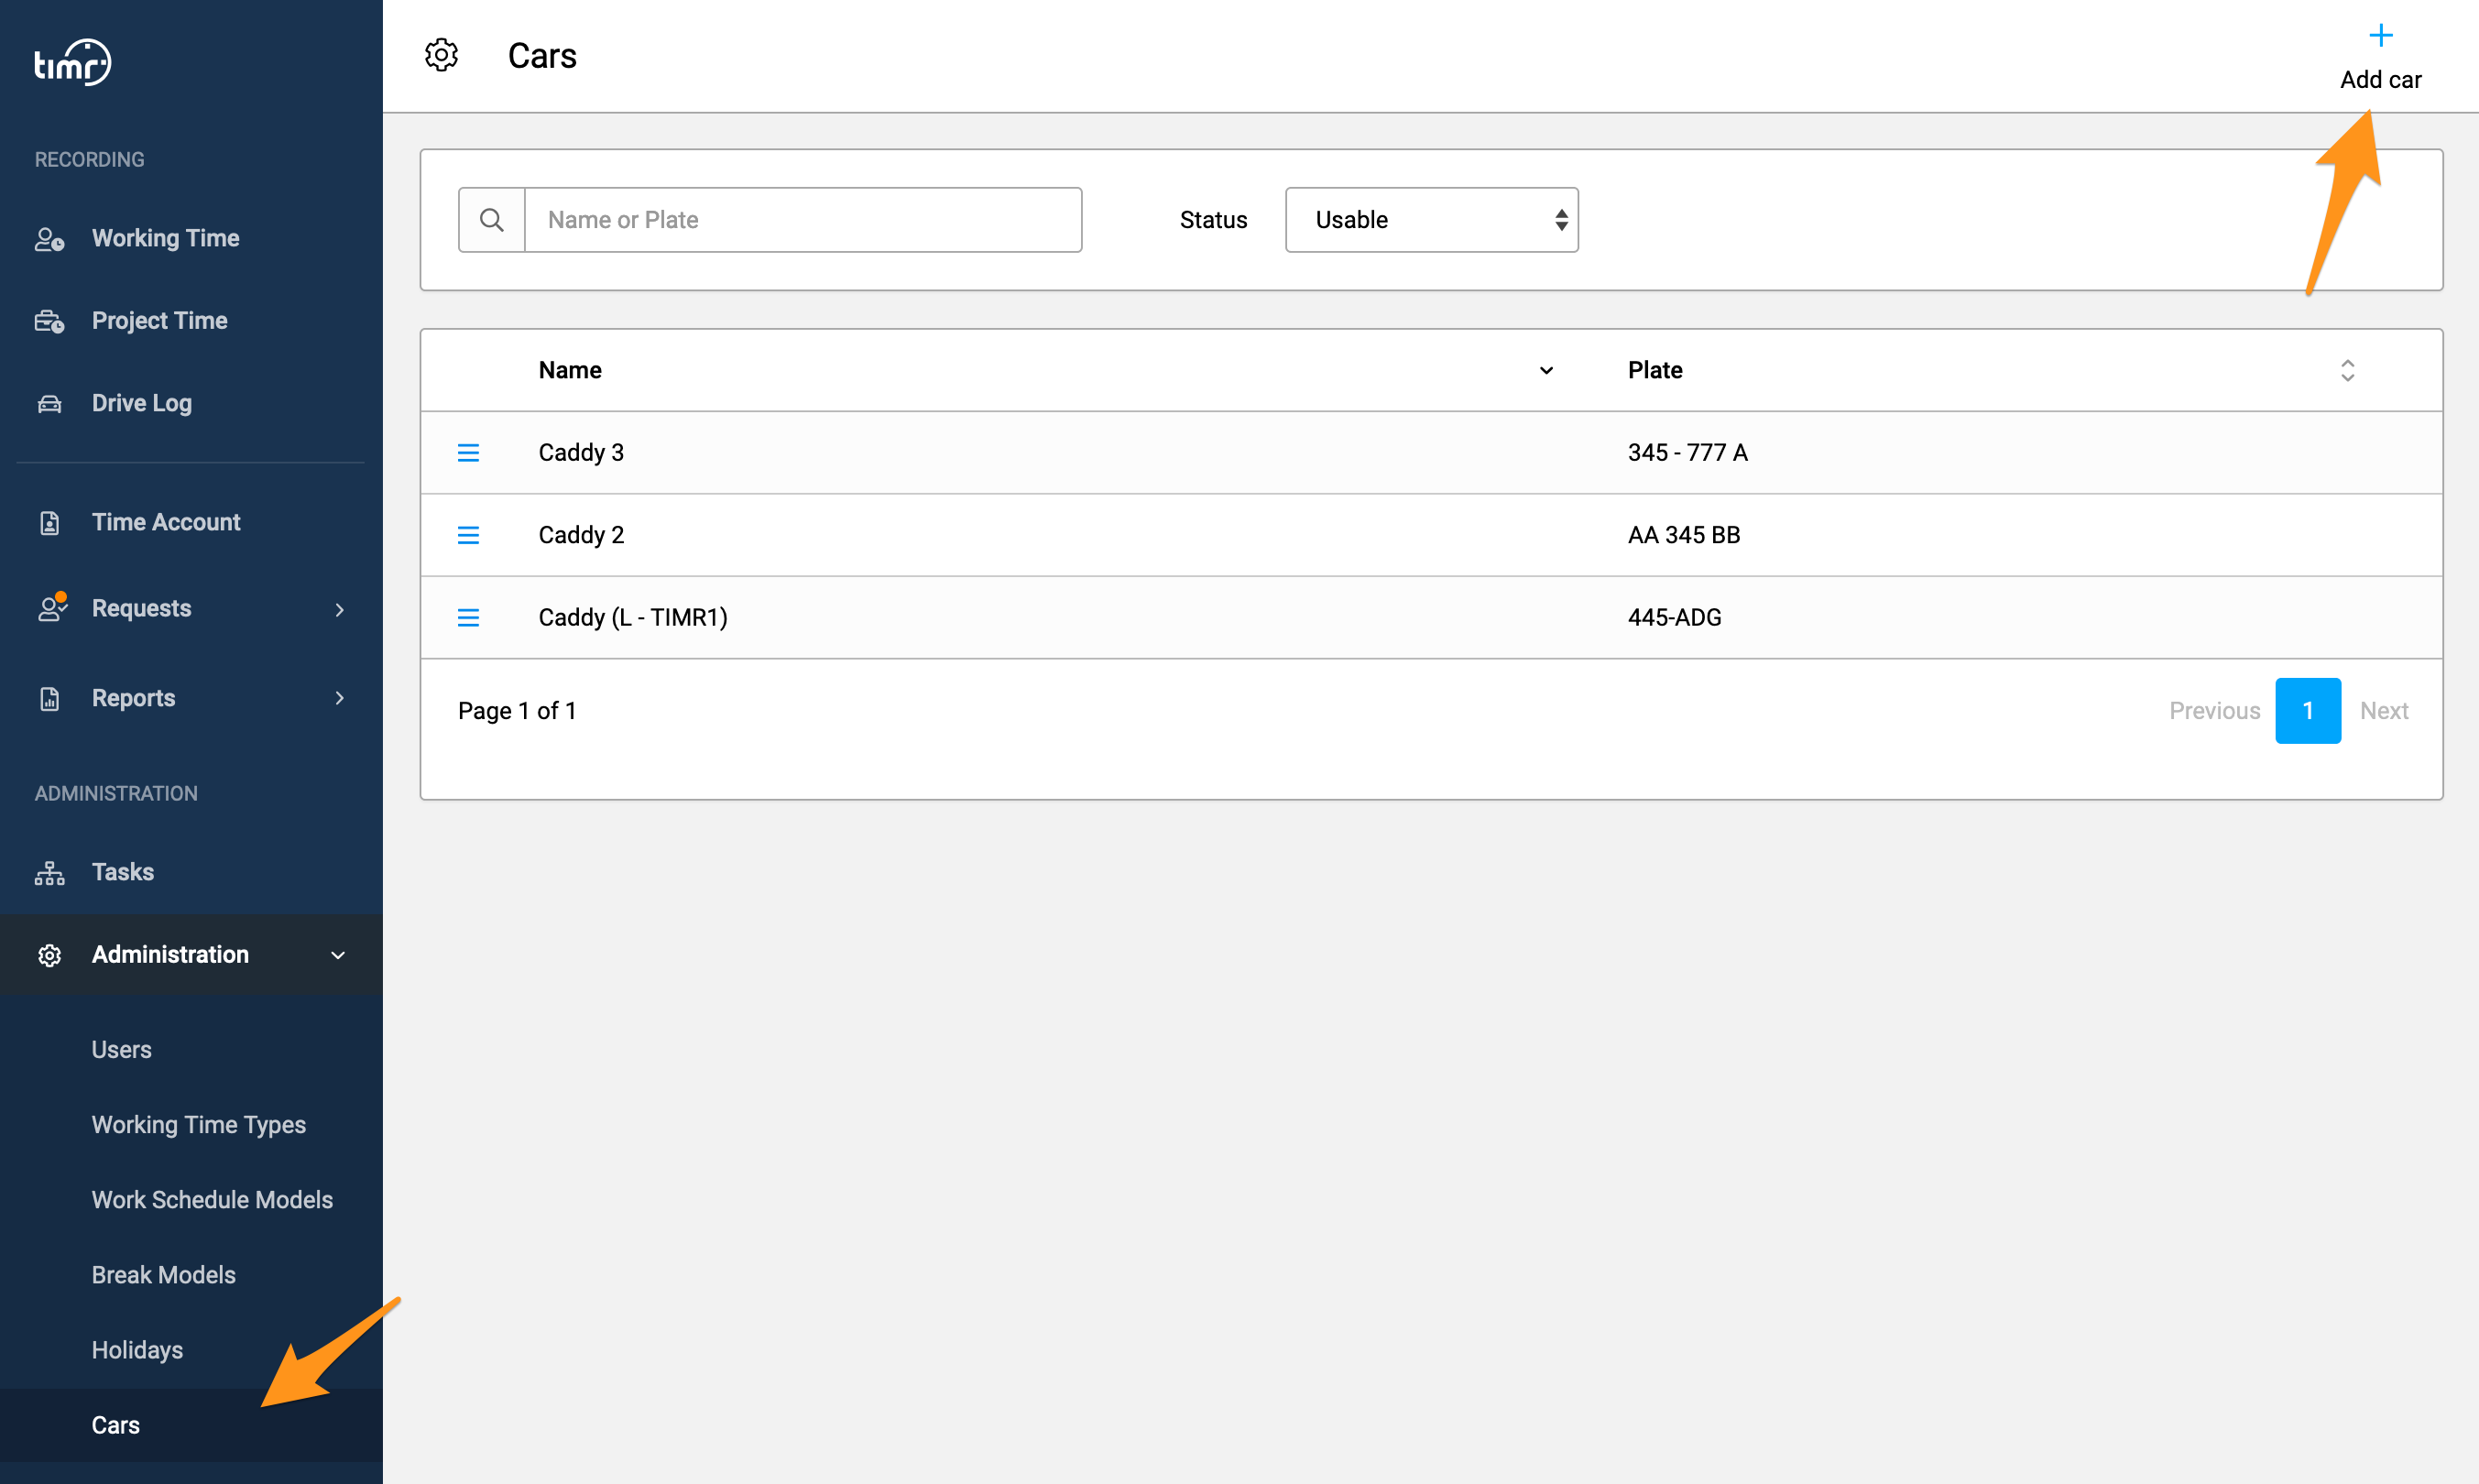
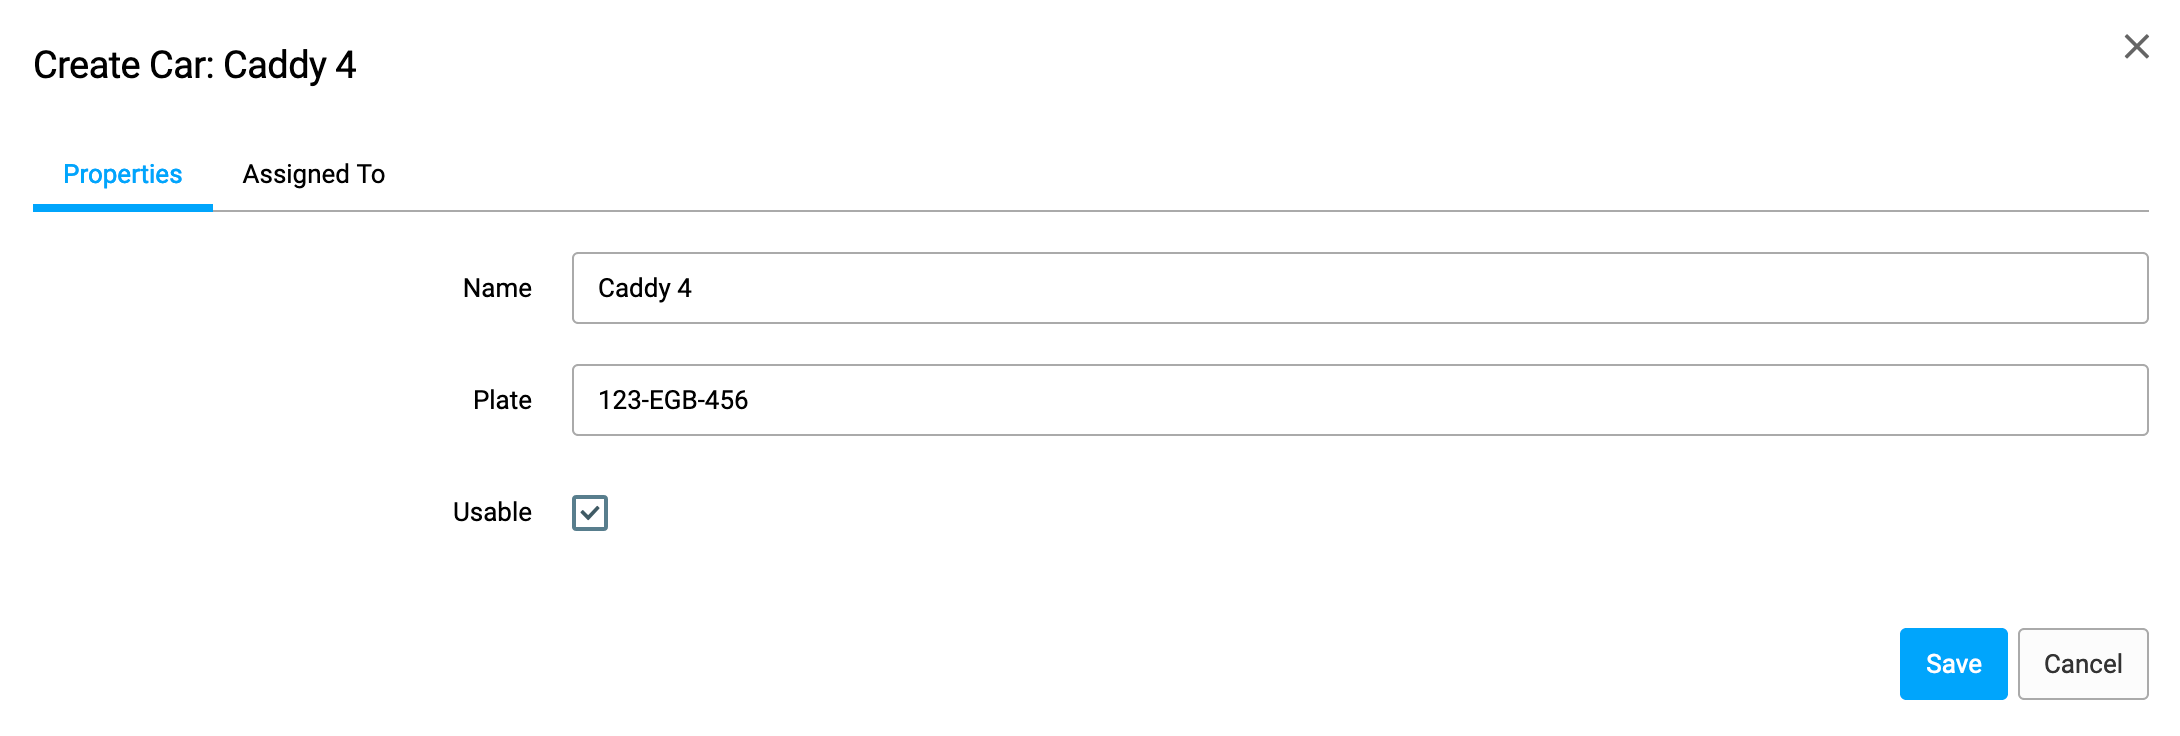
The car properties dialogue opens. Insert the "Name" of the car, the corresponding "Plate" and define if it's "Usable".
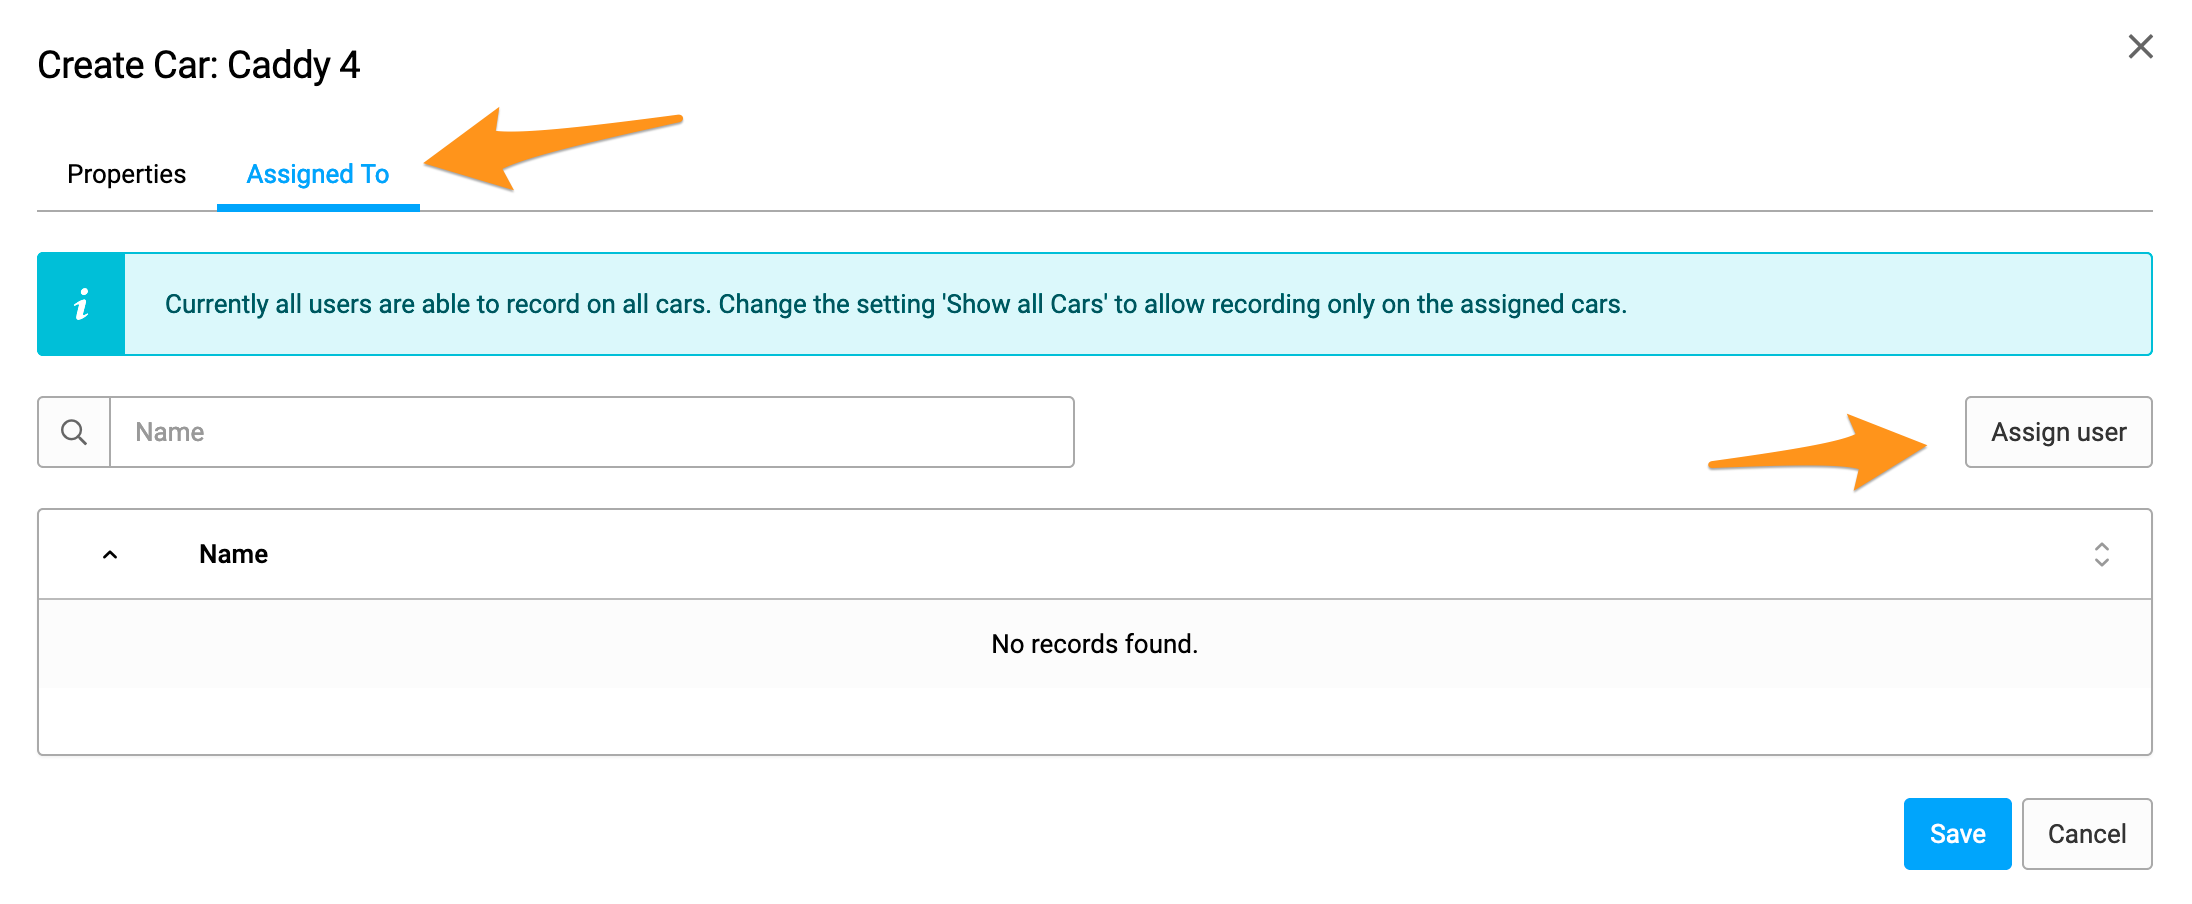
2. Assign a car
You can choose in the settings, if you want all users to see all cars and track mileage for them, or if you want to assign the cars to the users.
To assign a new car to your users, click on "Assign User". You assign the car to a user of your list by clicking on the + symbol.
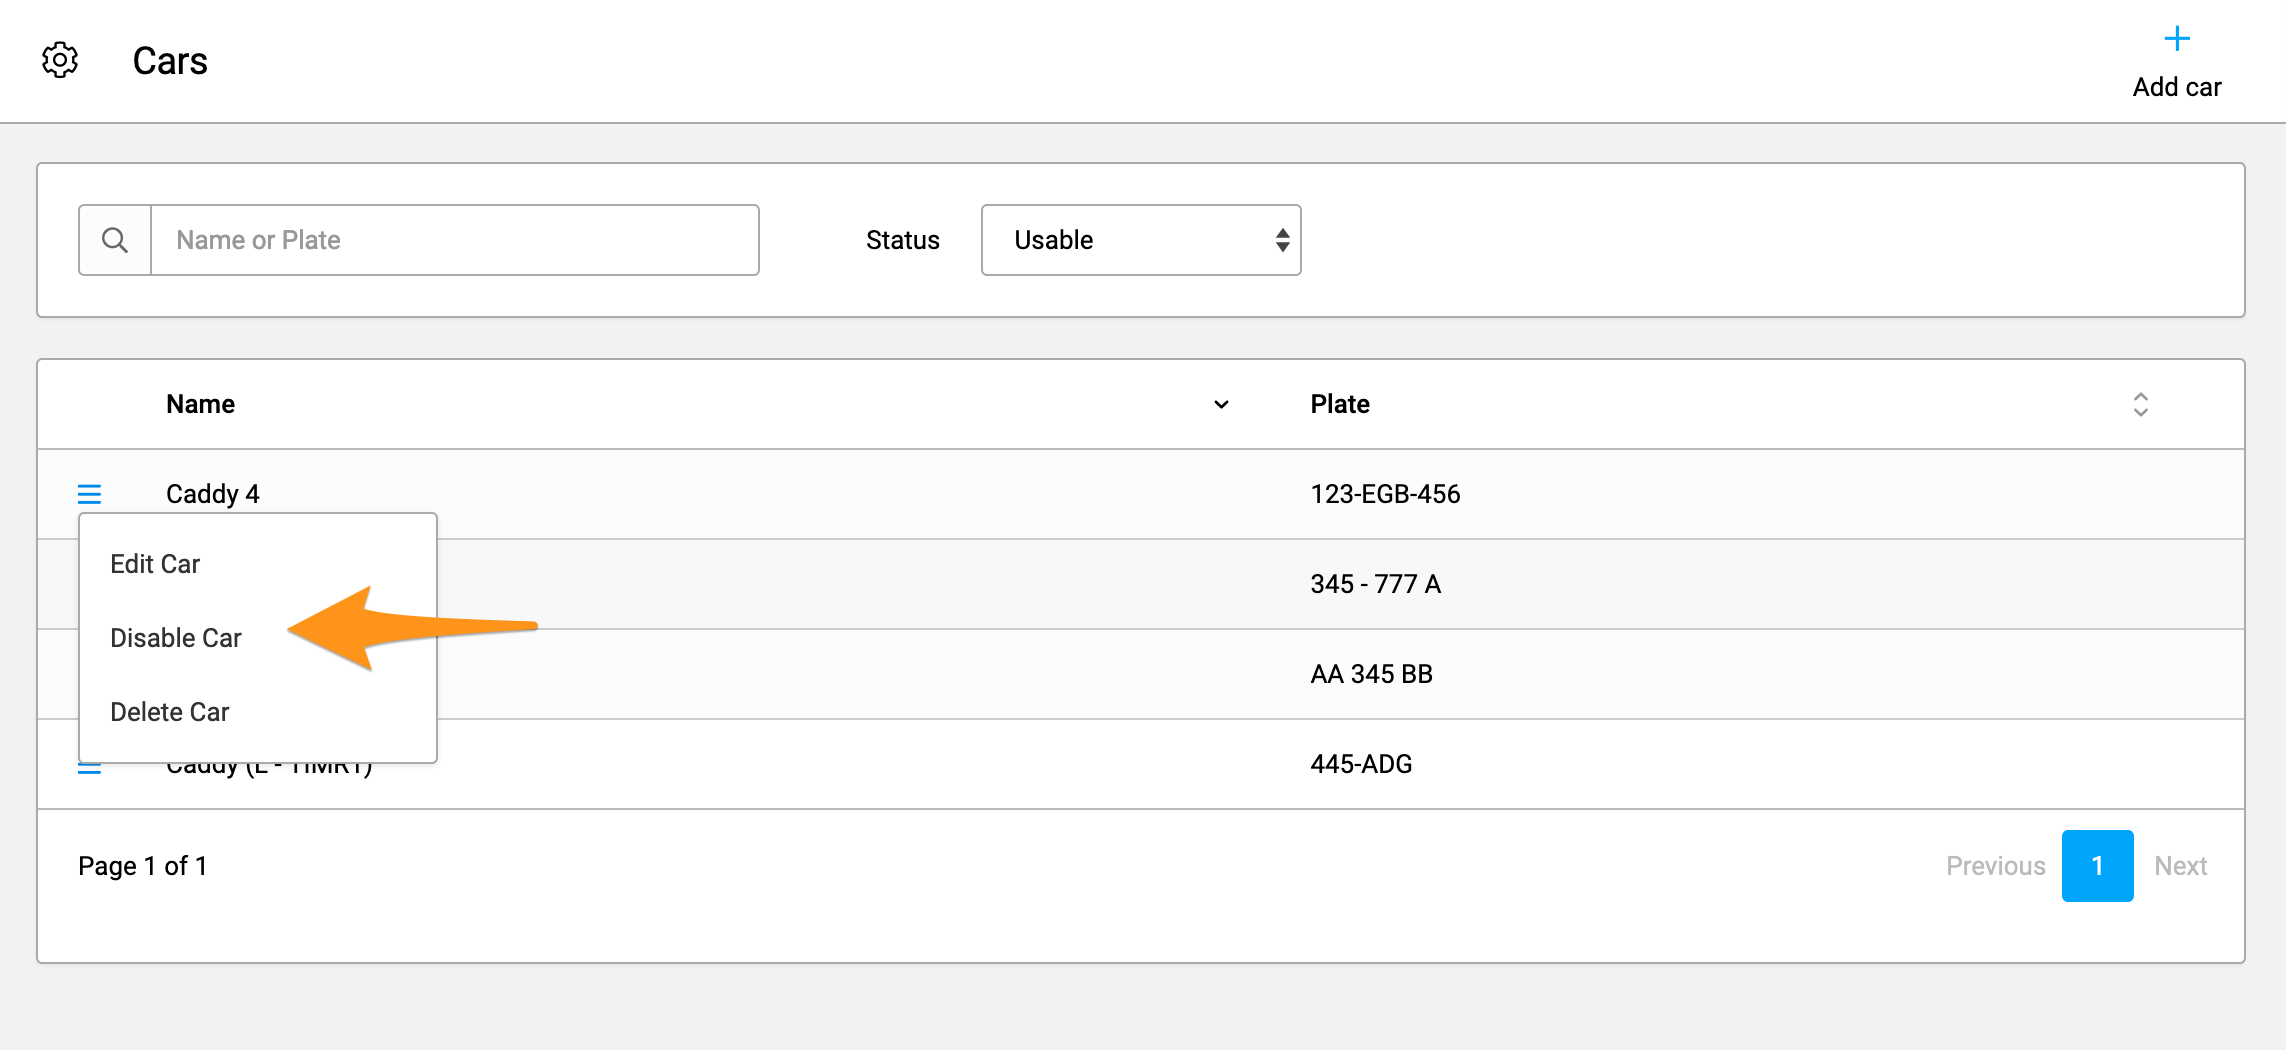
3. Disable a car
If you don't need a car any more, you can disable it. Just enter the "Administration/Cars" menu, click on the blue gear symbol next to the car and choose "Disable car".
4. Enable a car
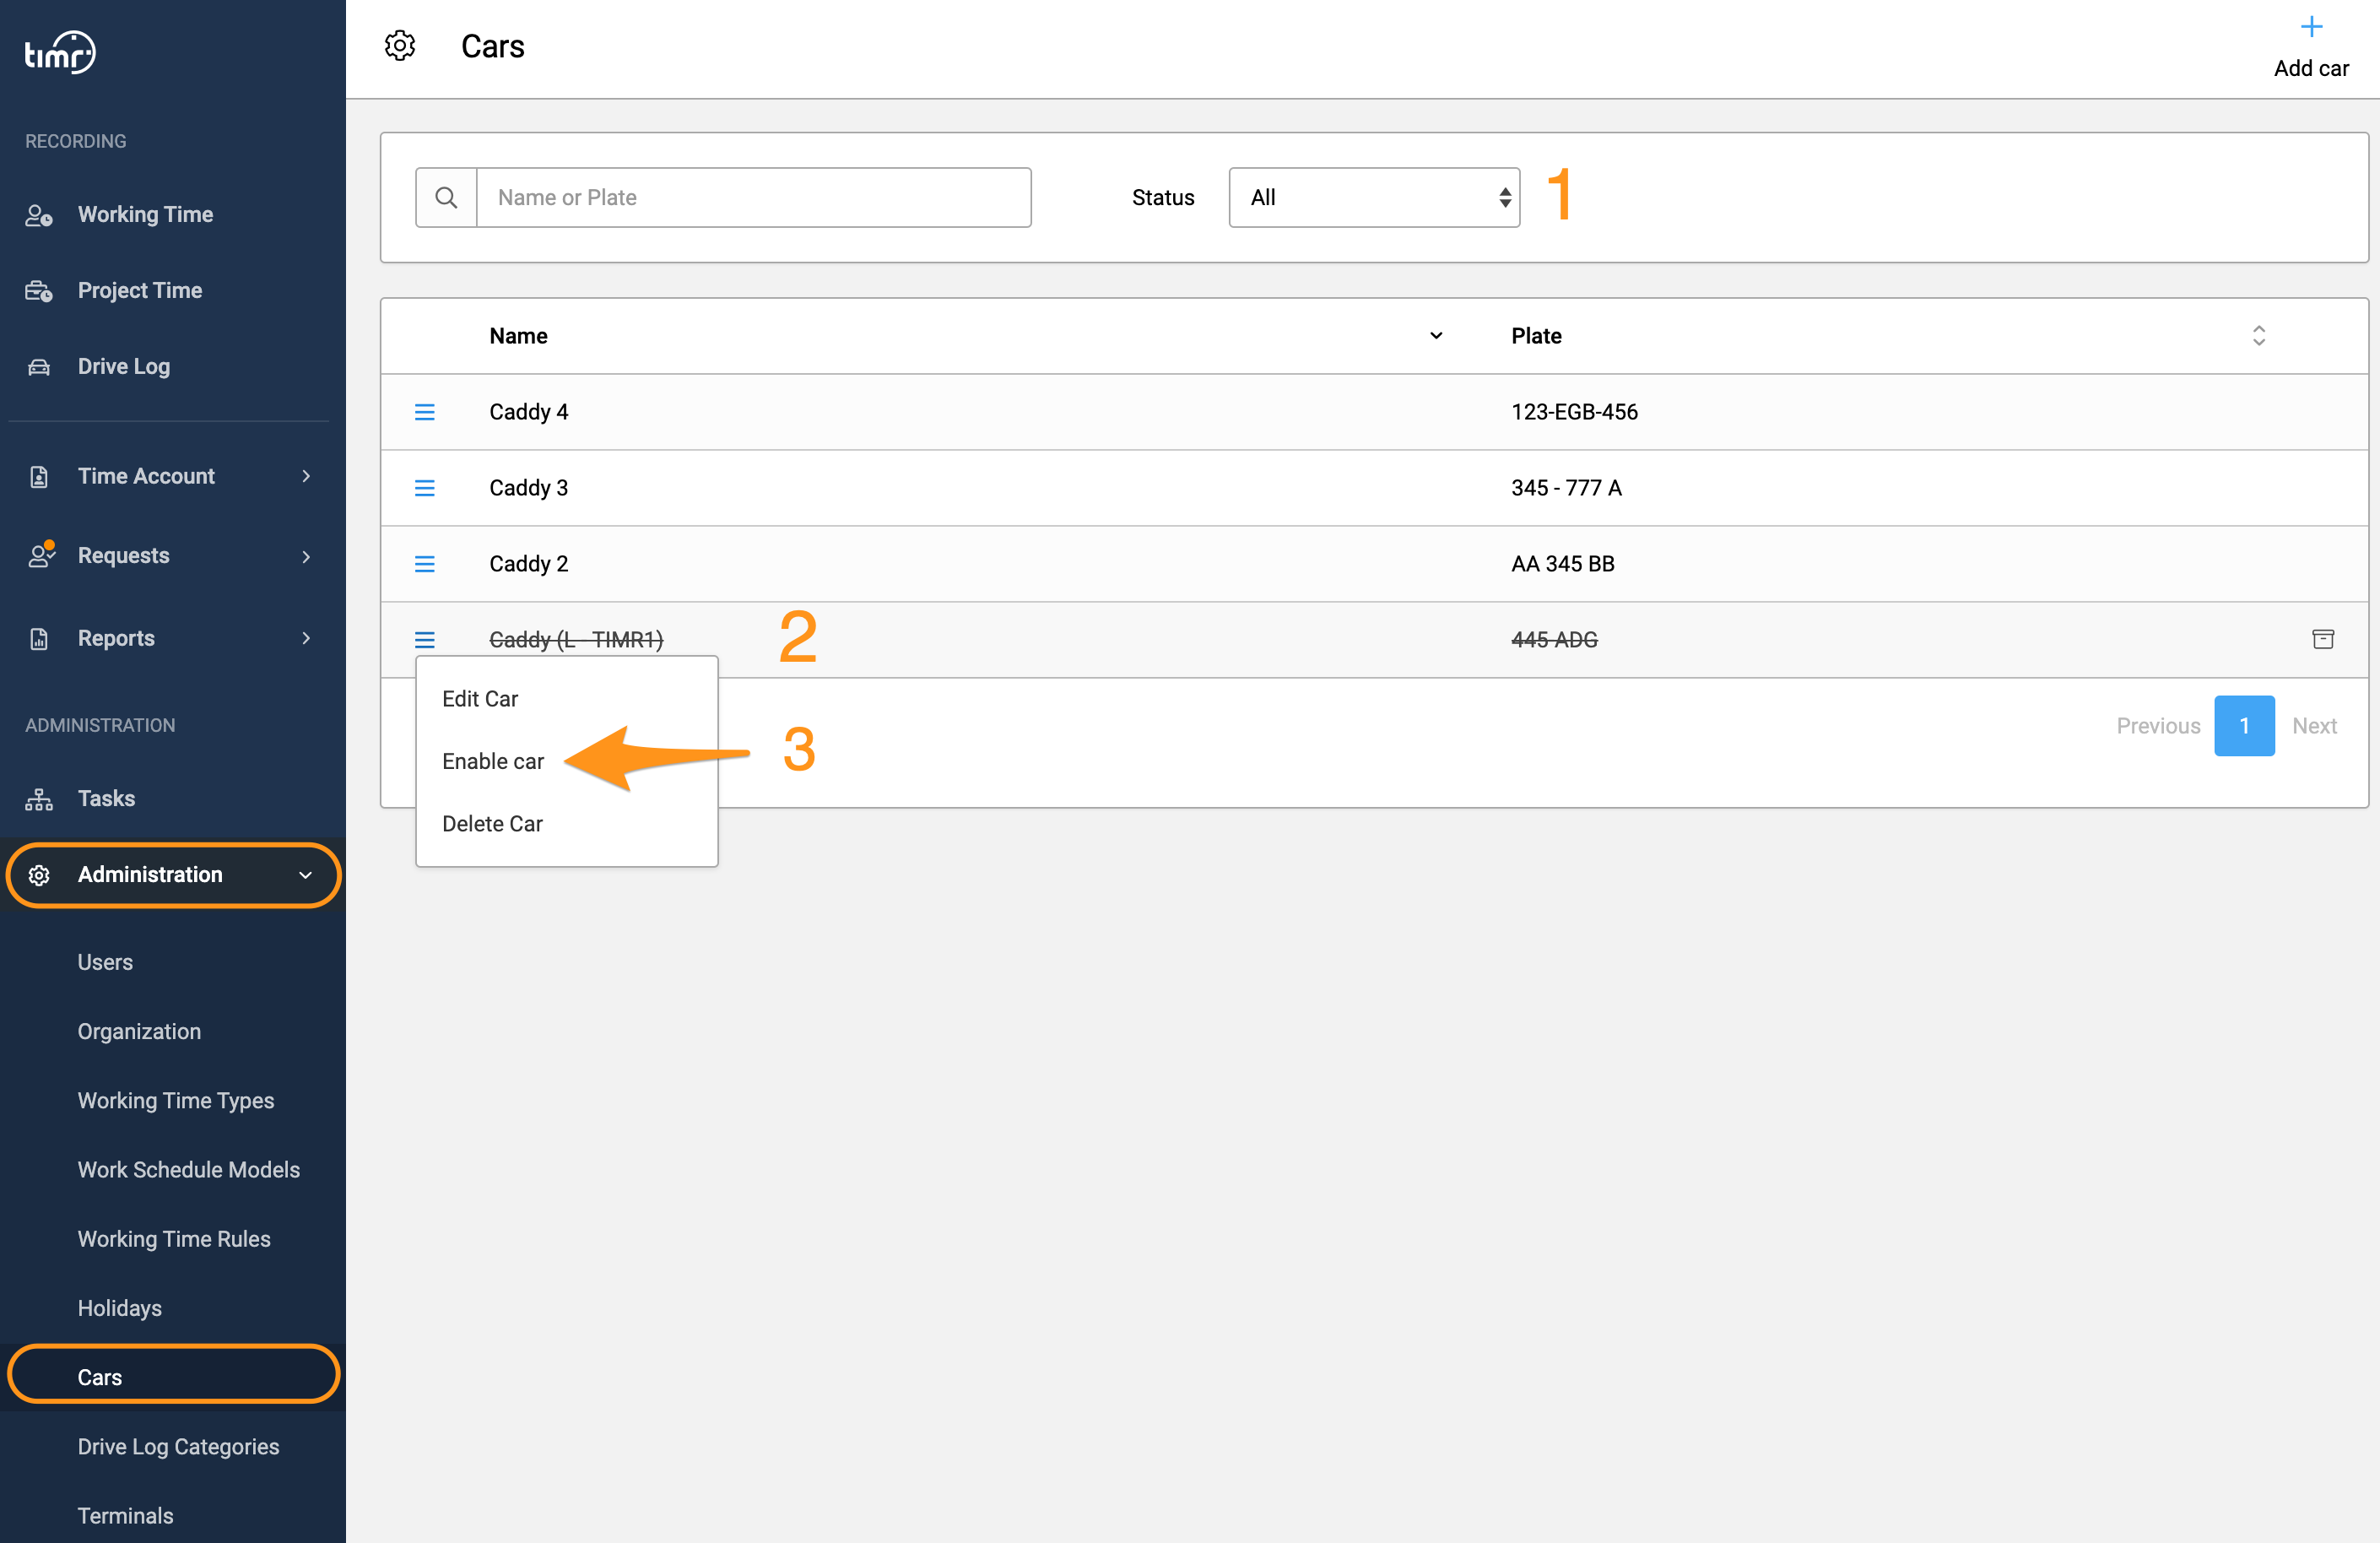
If you want to reactivate a car, open the "Administration/Cars" menu.
Marker 1: Change the status to "All" or "Usable". This will list deactivated vehicles.
Marker 2: You can see disabled cars by the fact that it is shown crossed out and the icon for "Archive" is displayed on the right.
Marker 3: By clicking on the menu icon, you will get the "Enable car" option, among others. If you select this option, the car will be available for selection again.
Next steps
This documentation shows you how to use the timr Drive Log in an ideal way.
Comments
0 comments
Please sign in to leave a comment.