
timr consists of a web application and the timr app on your iPhone. If you've not yet downloaded the timr App you can do this here.
Marker 1: Choose "CREATE ACCOUNT" to register you as a new timr user.
Marker 2: If you already have a timr account, you can connect your Webaccount with the account on your iPhone and choose "LOGIN"
Create Account: Configure your timr Account
First you have to enter your first name and your last name.
Next you have to enter your mail address and you set a password.
With the next step you choose your timr URL. The first part of your webaddress is the account name, normally this is your company name. If your timr webaddress is "doe.timr.com" then "doe" is your account name.
If your chosen timr URL is still available you can go on.
If your chosen timr URL already exists (belonging to another client) then you have to choose another one.
After setting your identifier please read our terms of service. With "Start Trial" you agree to them and set up your Trial Account.
Before setting up your account you now confirm your email address.
As soon as you have confirmed your email address you can configure your timr account.
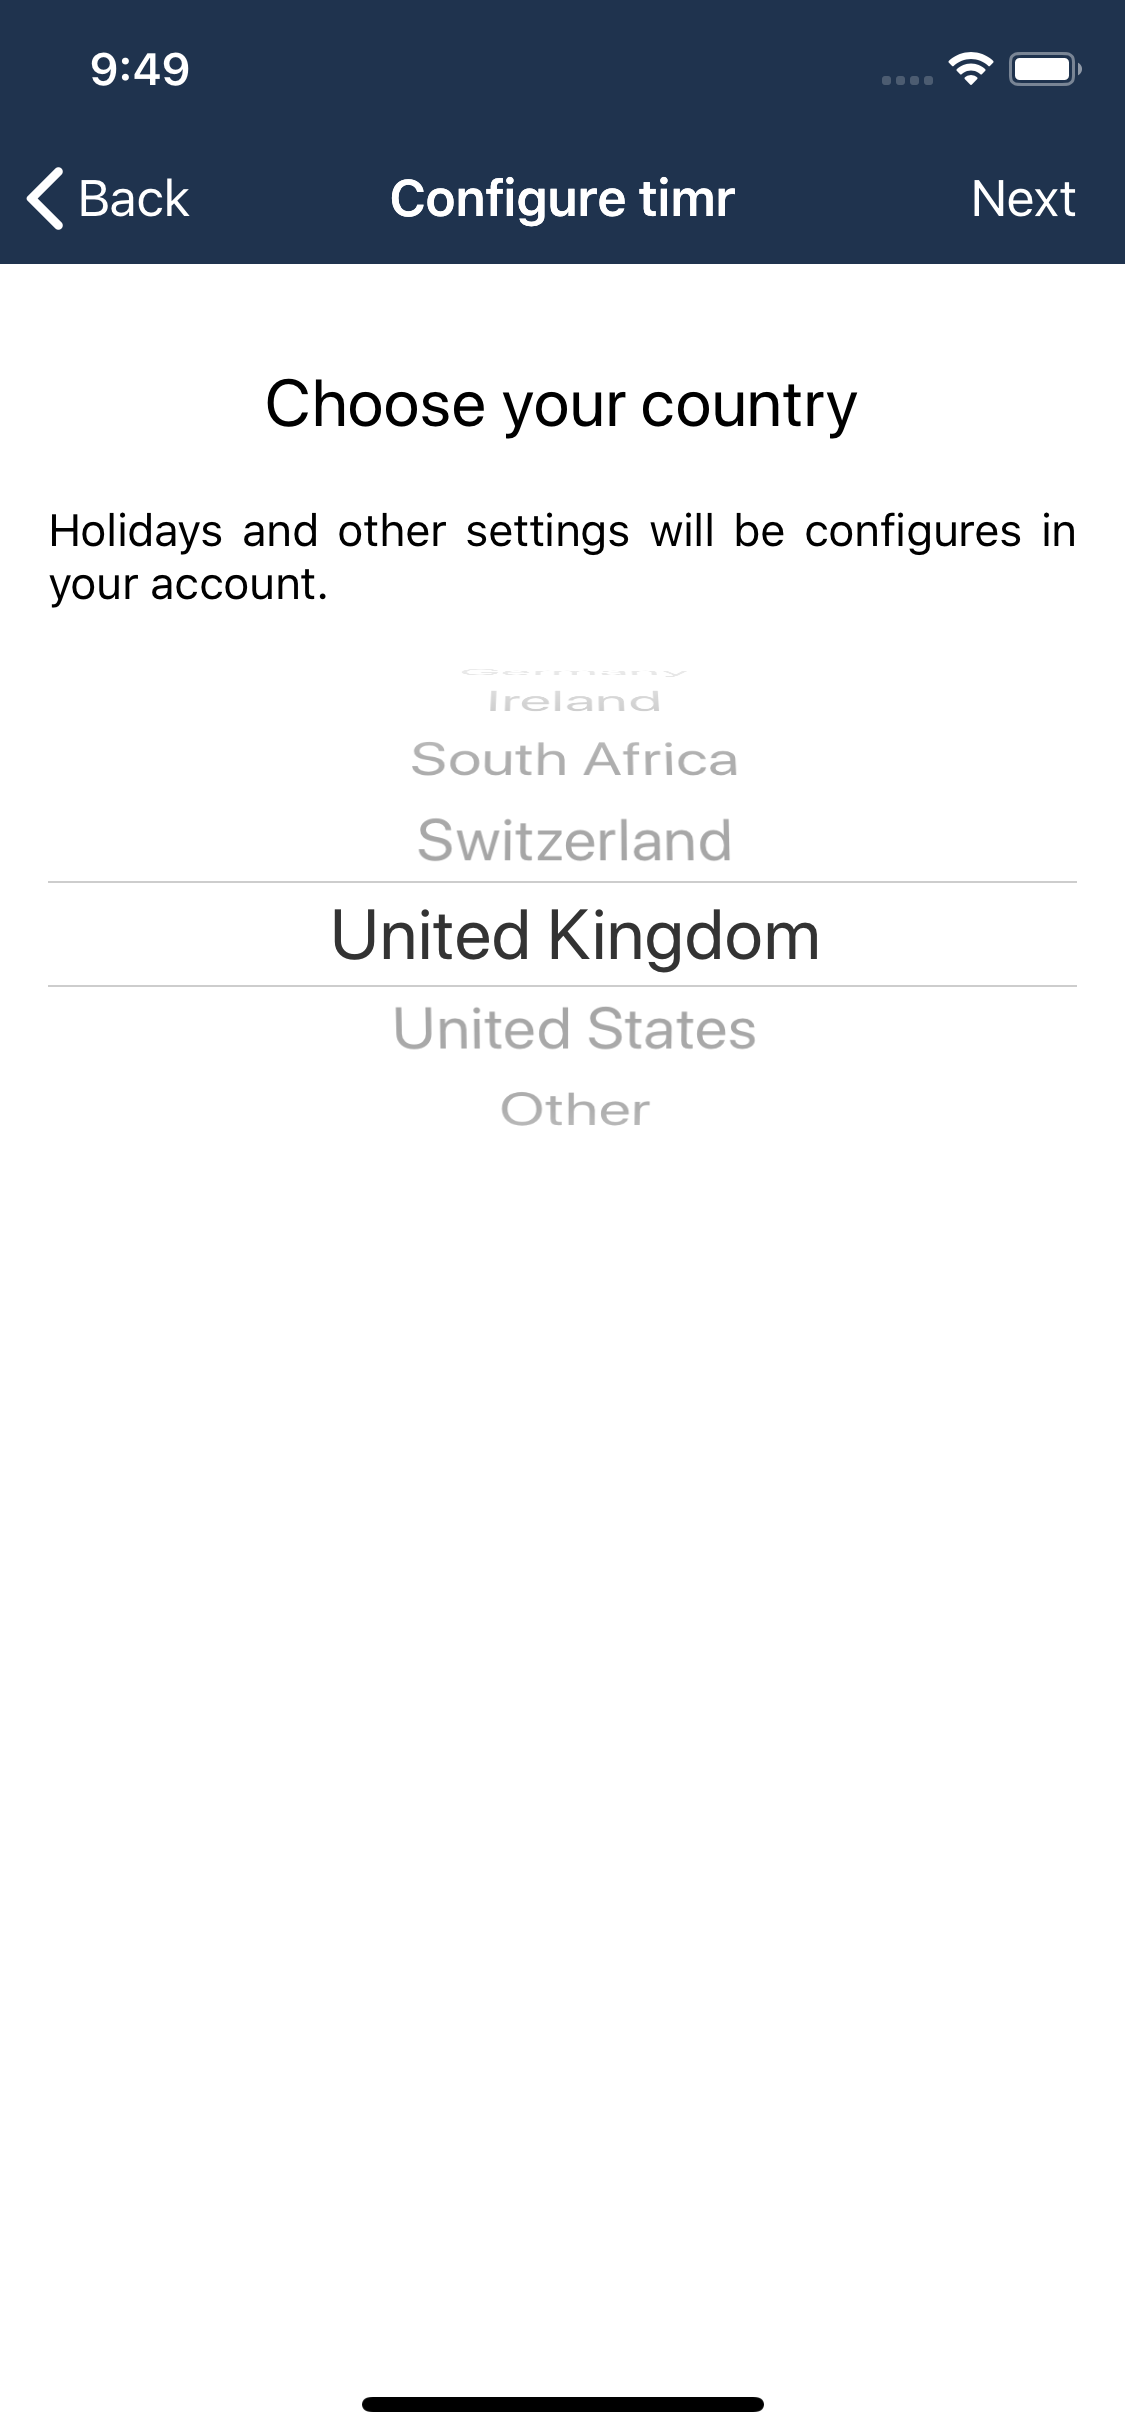
First, choose your country.
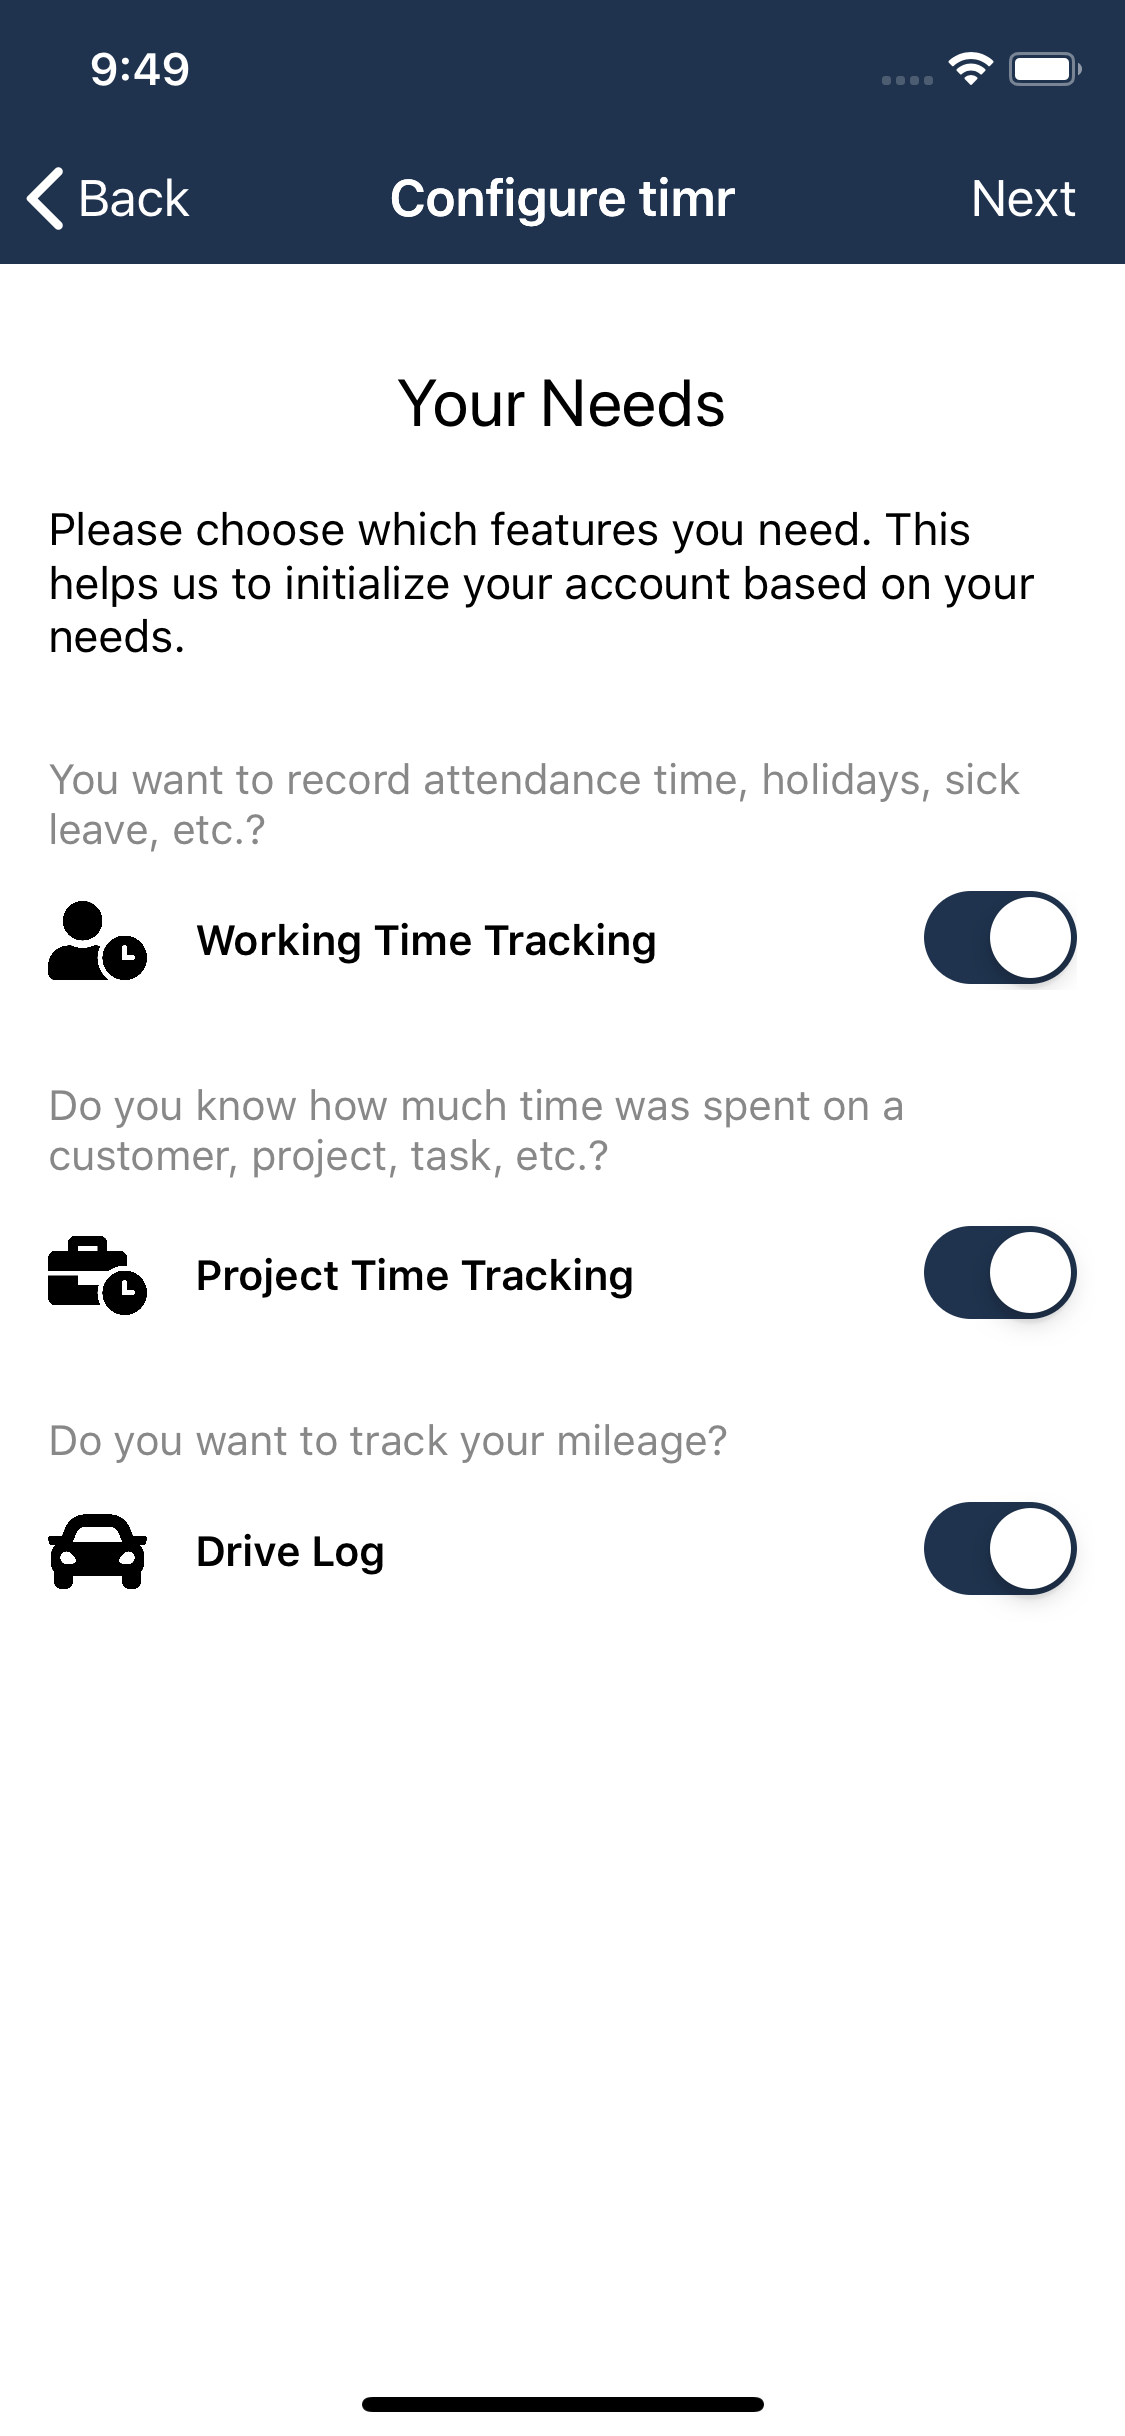
In the next step choose the features you would like to use.

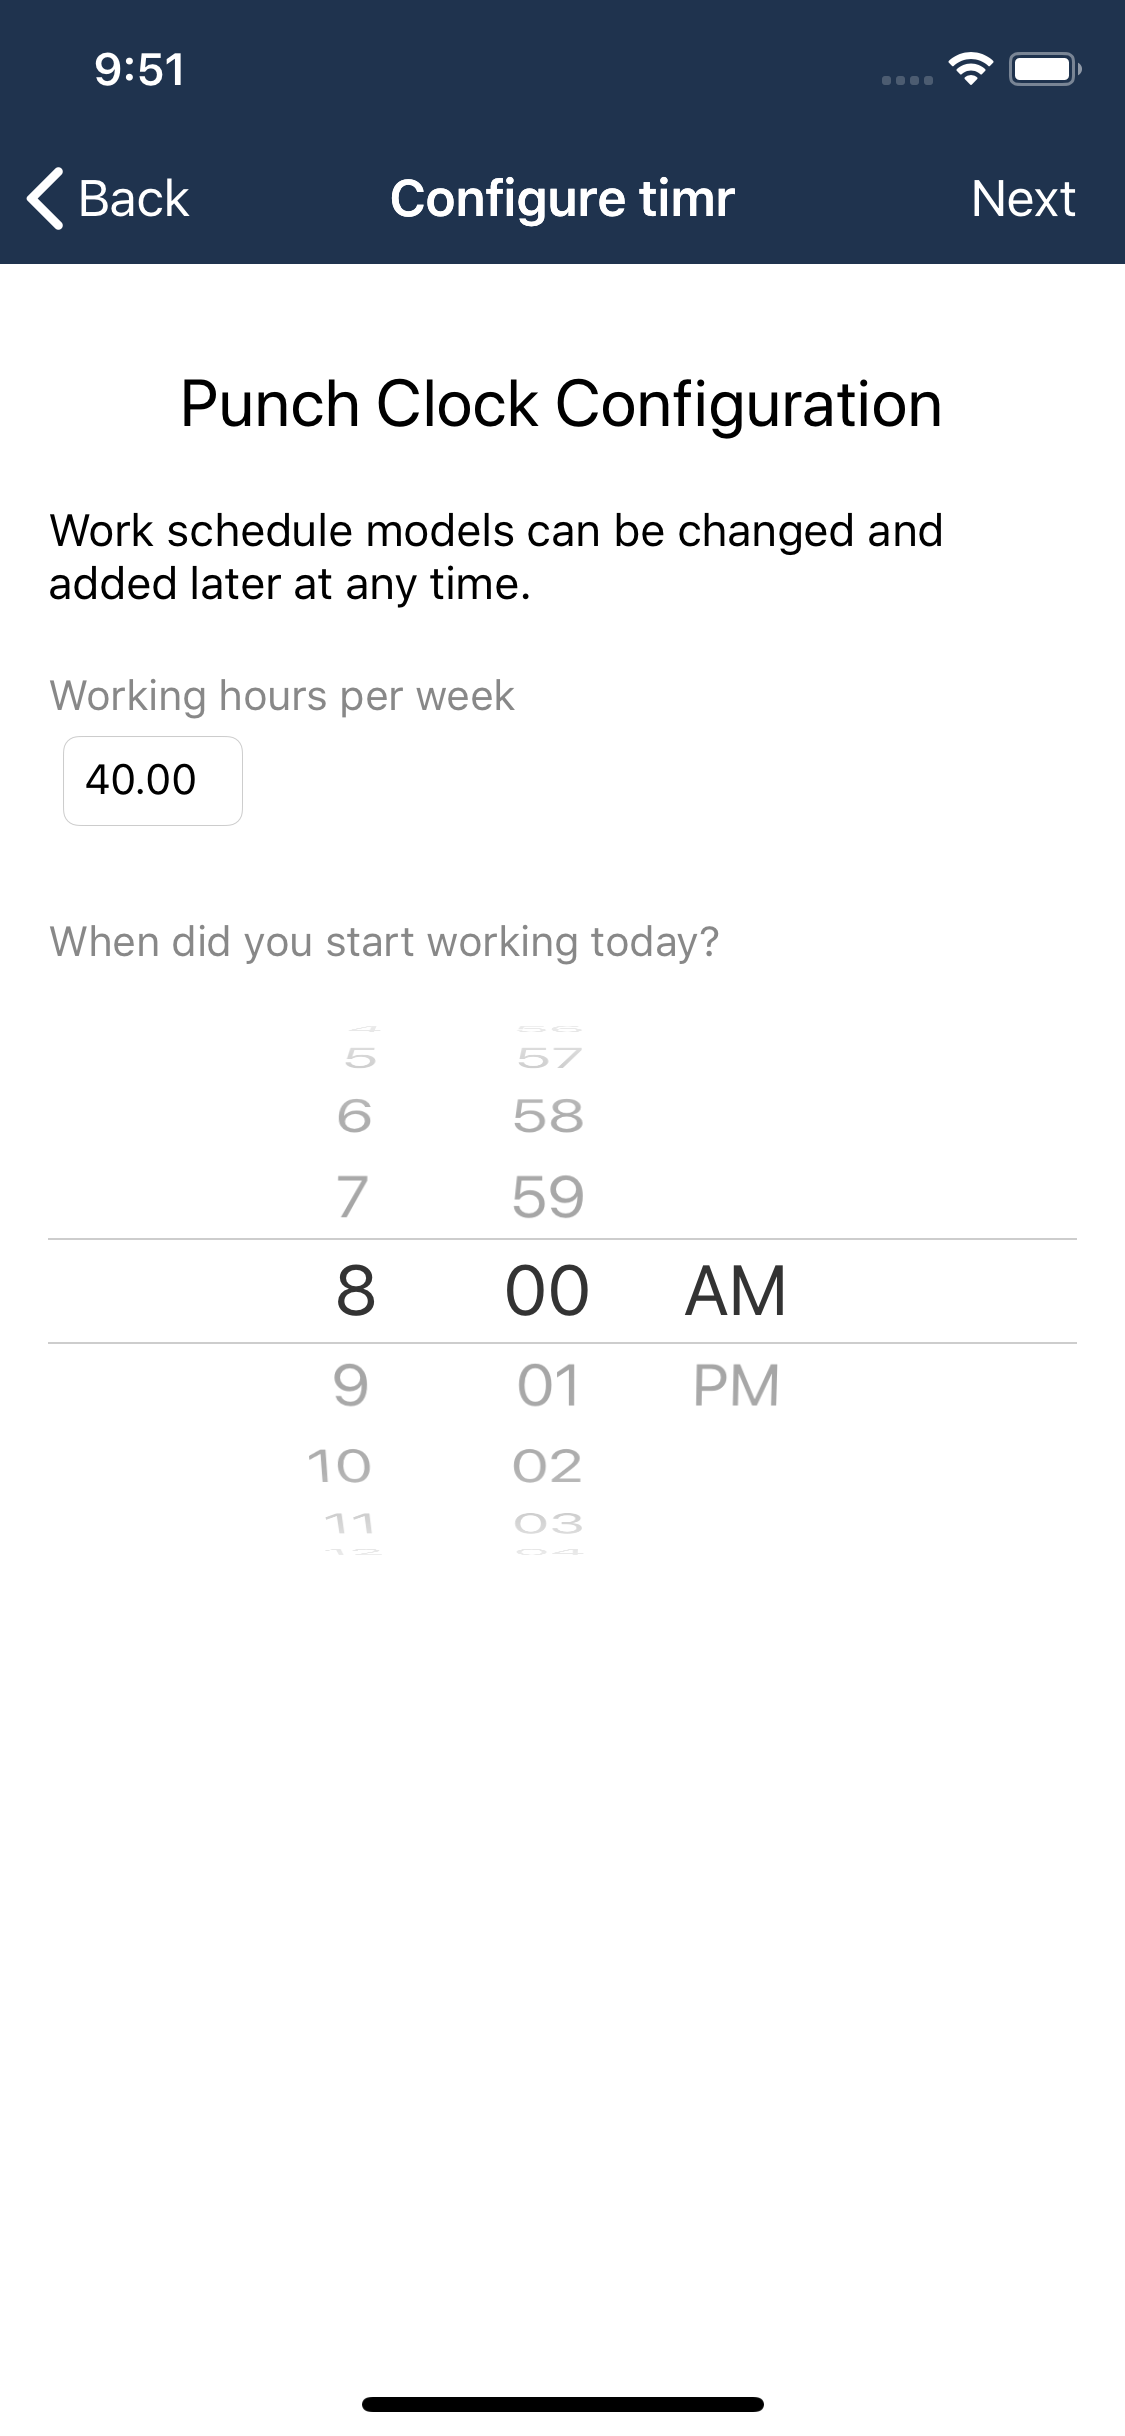
Next, if you have chosen working time tracking as a feature, you configure your punch clock.
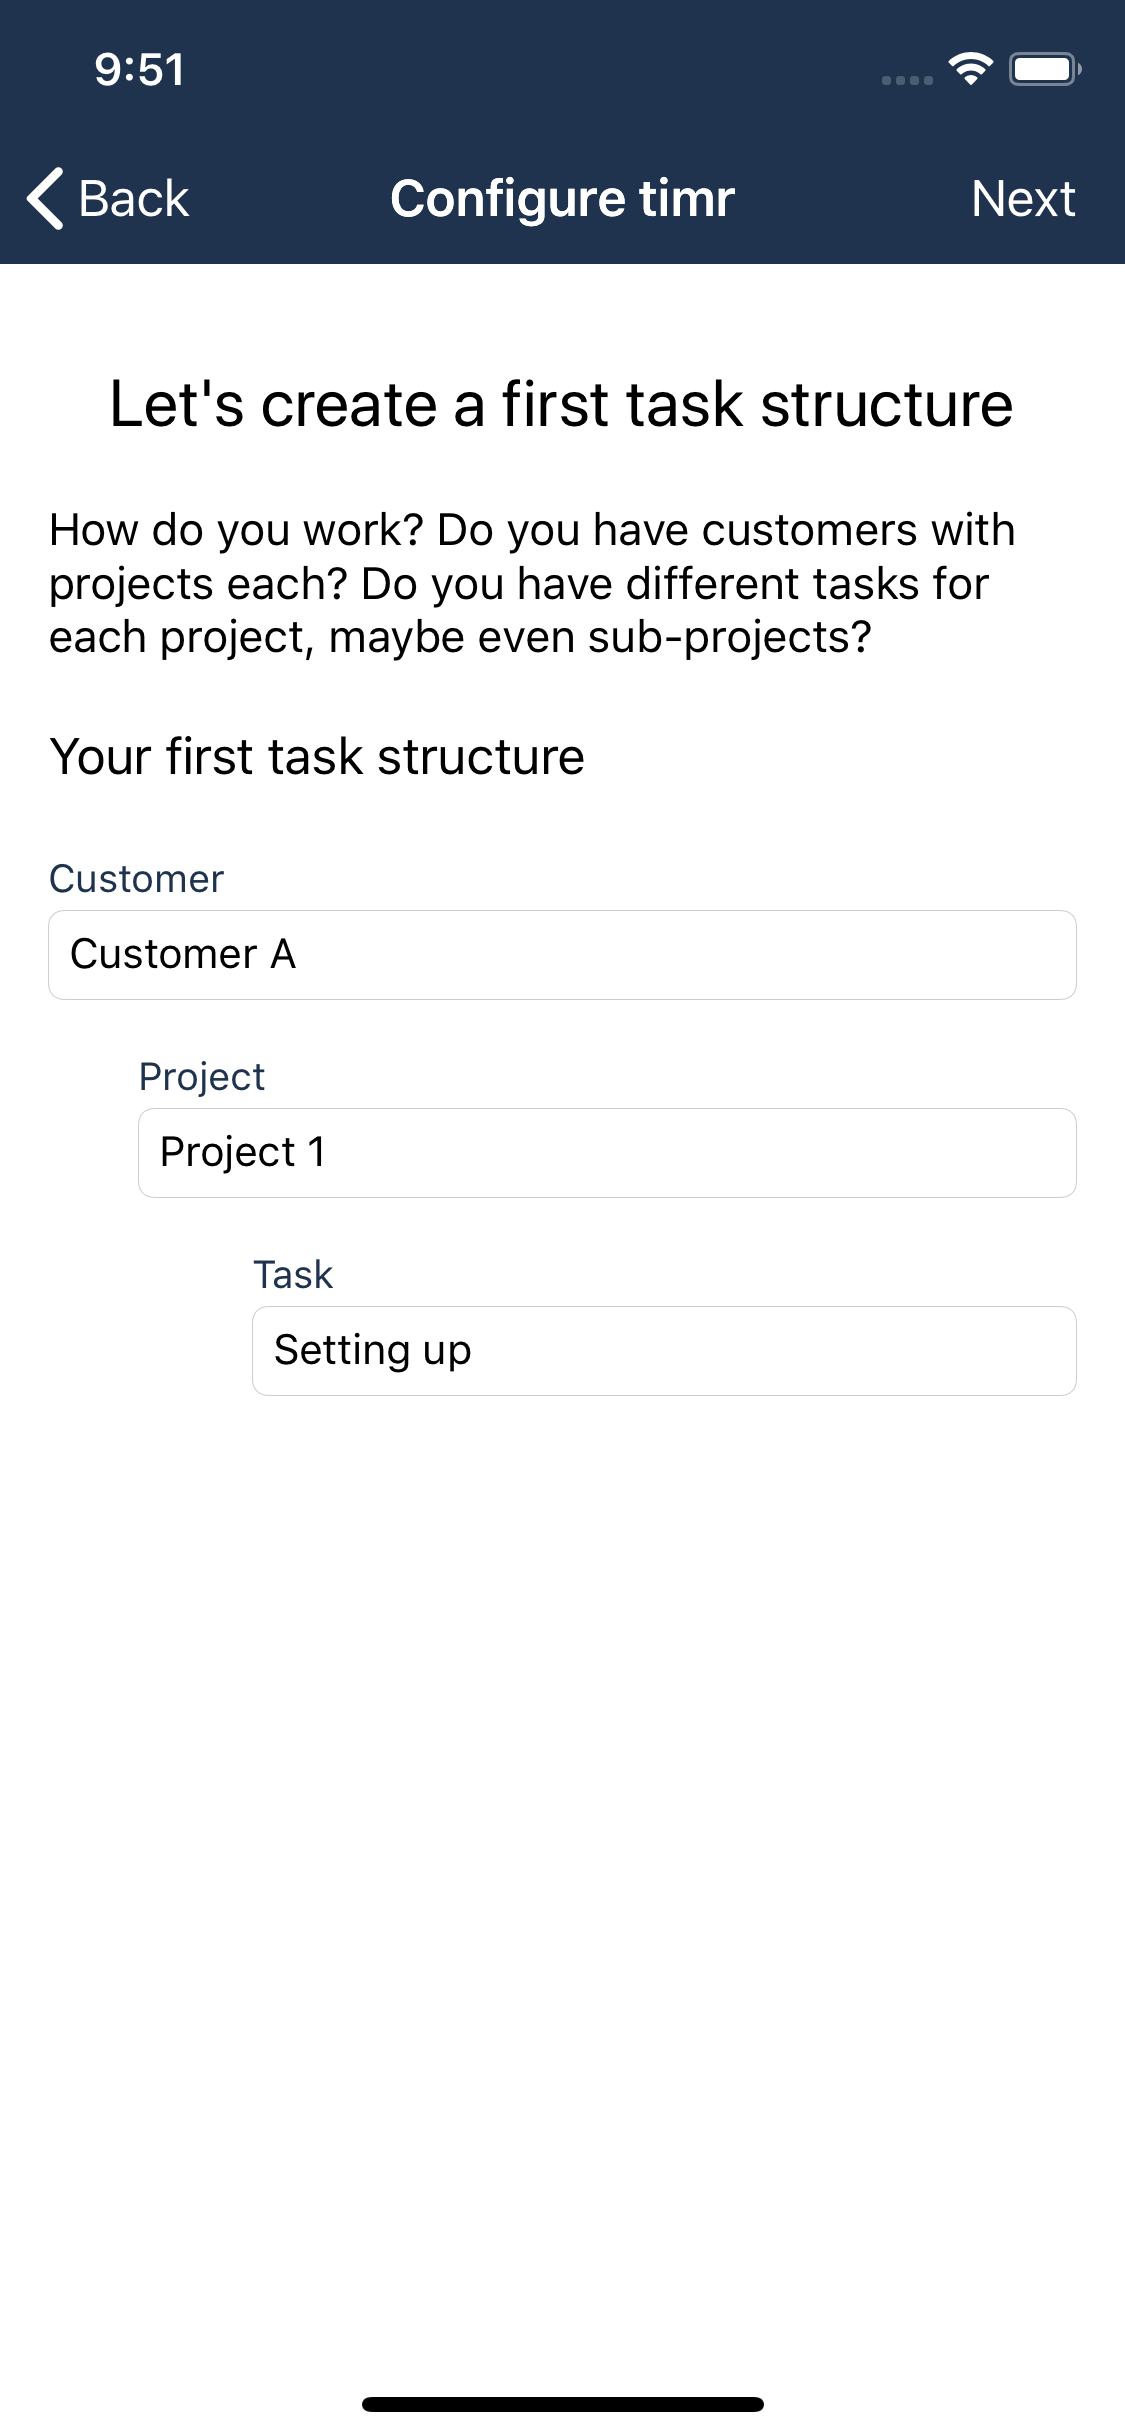
If you have chosen project time tracking as a feature you can now set up your first task structure.
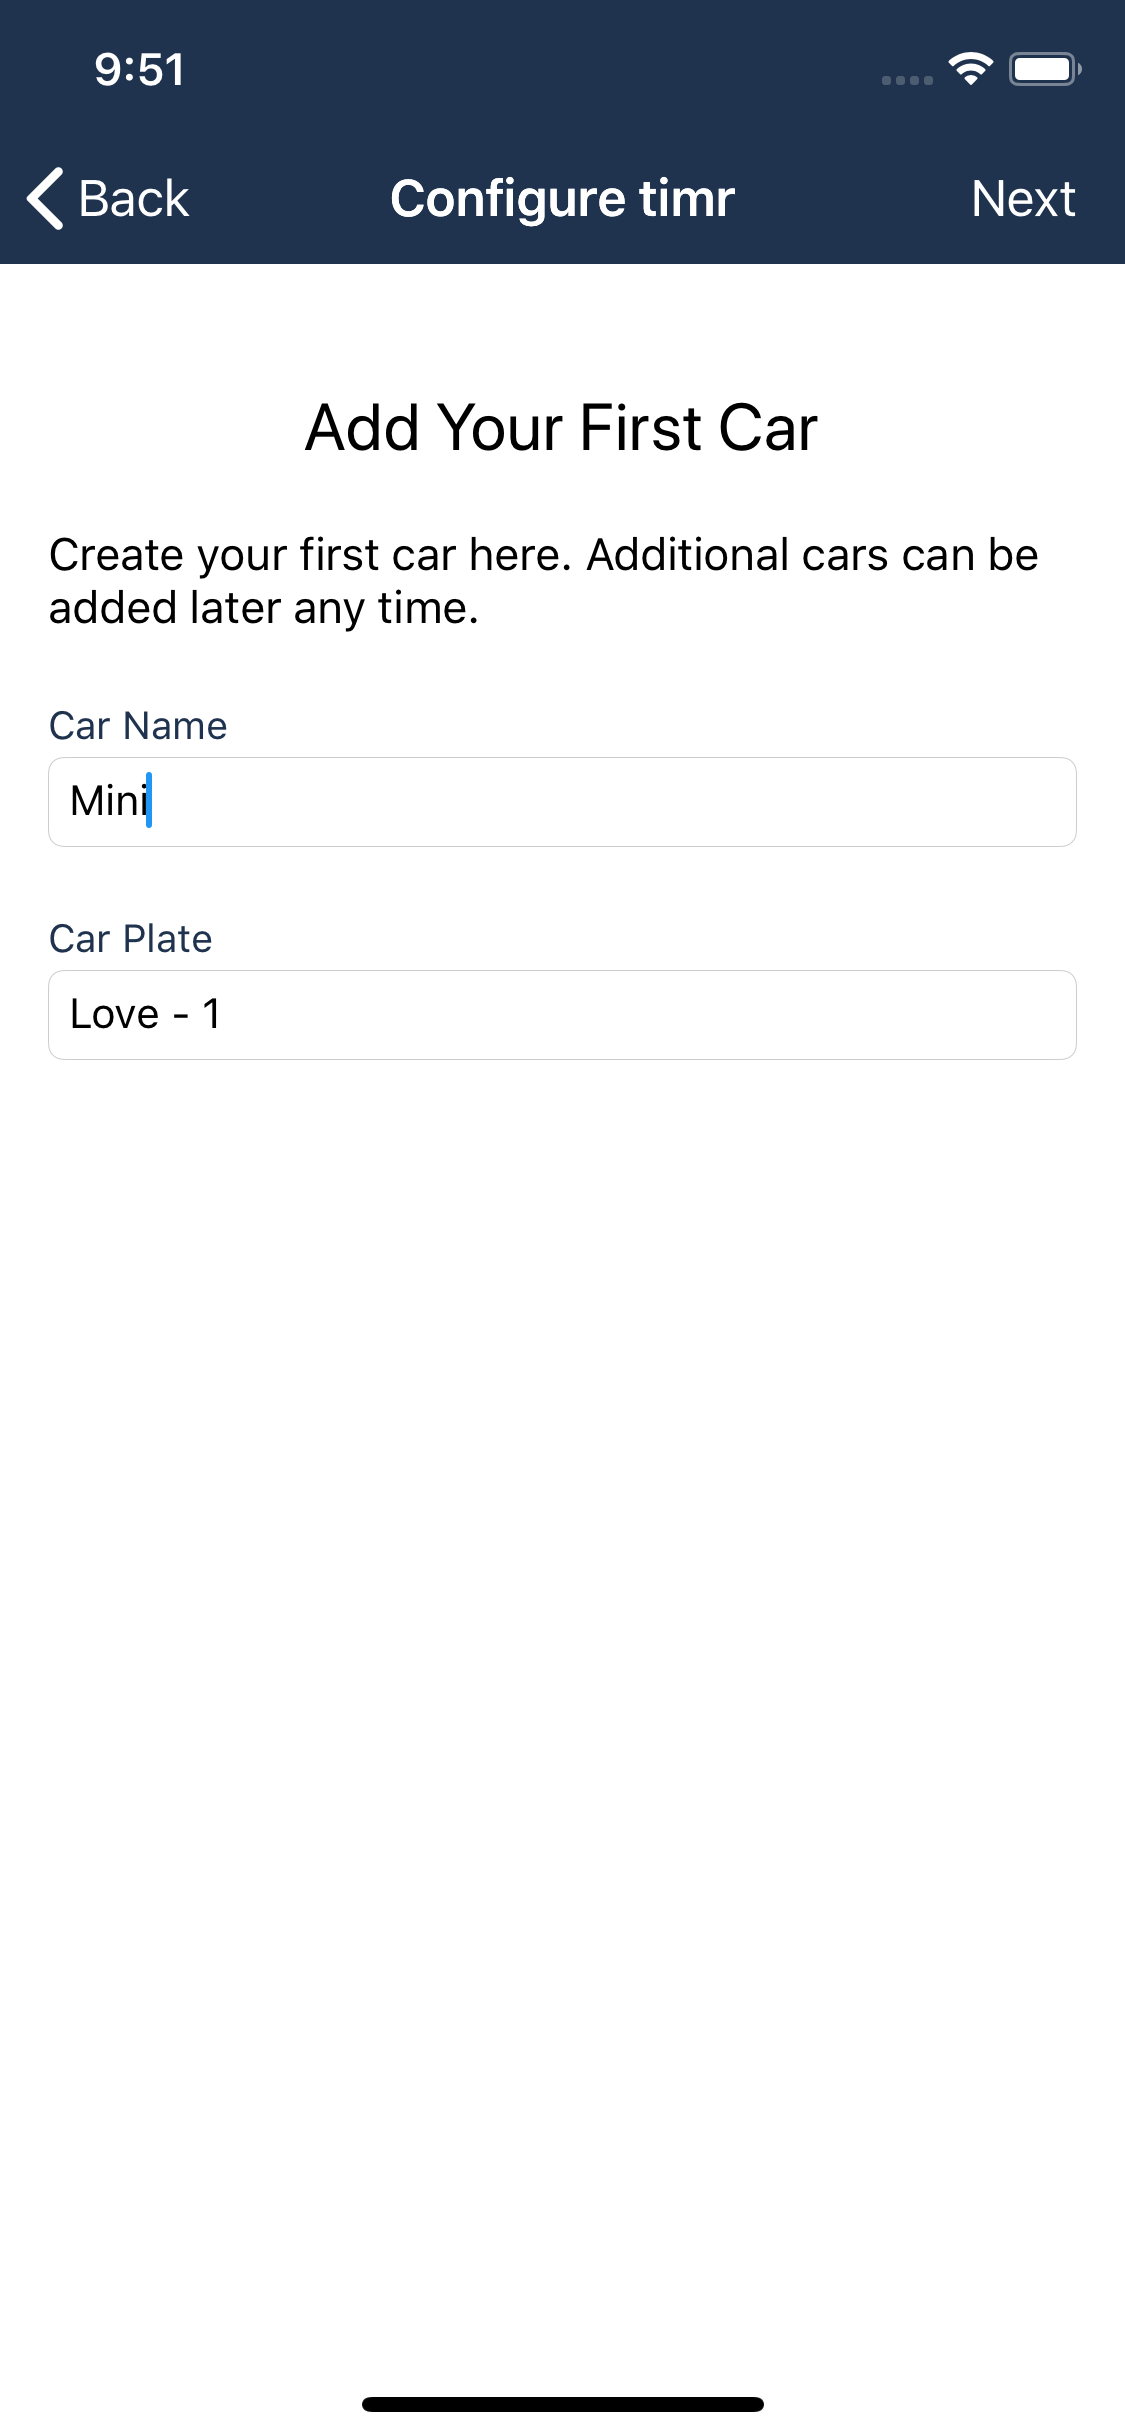
If you have chosen the drive log feature, you can add your first car for mileage tracking now.
Now you have set up the basics of your account.

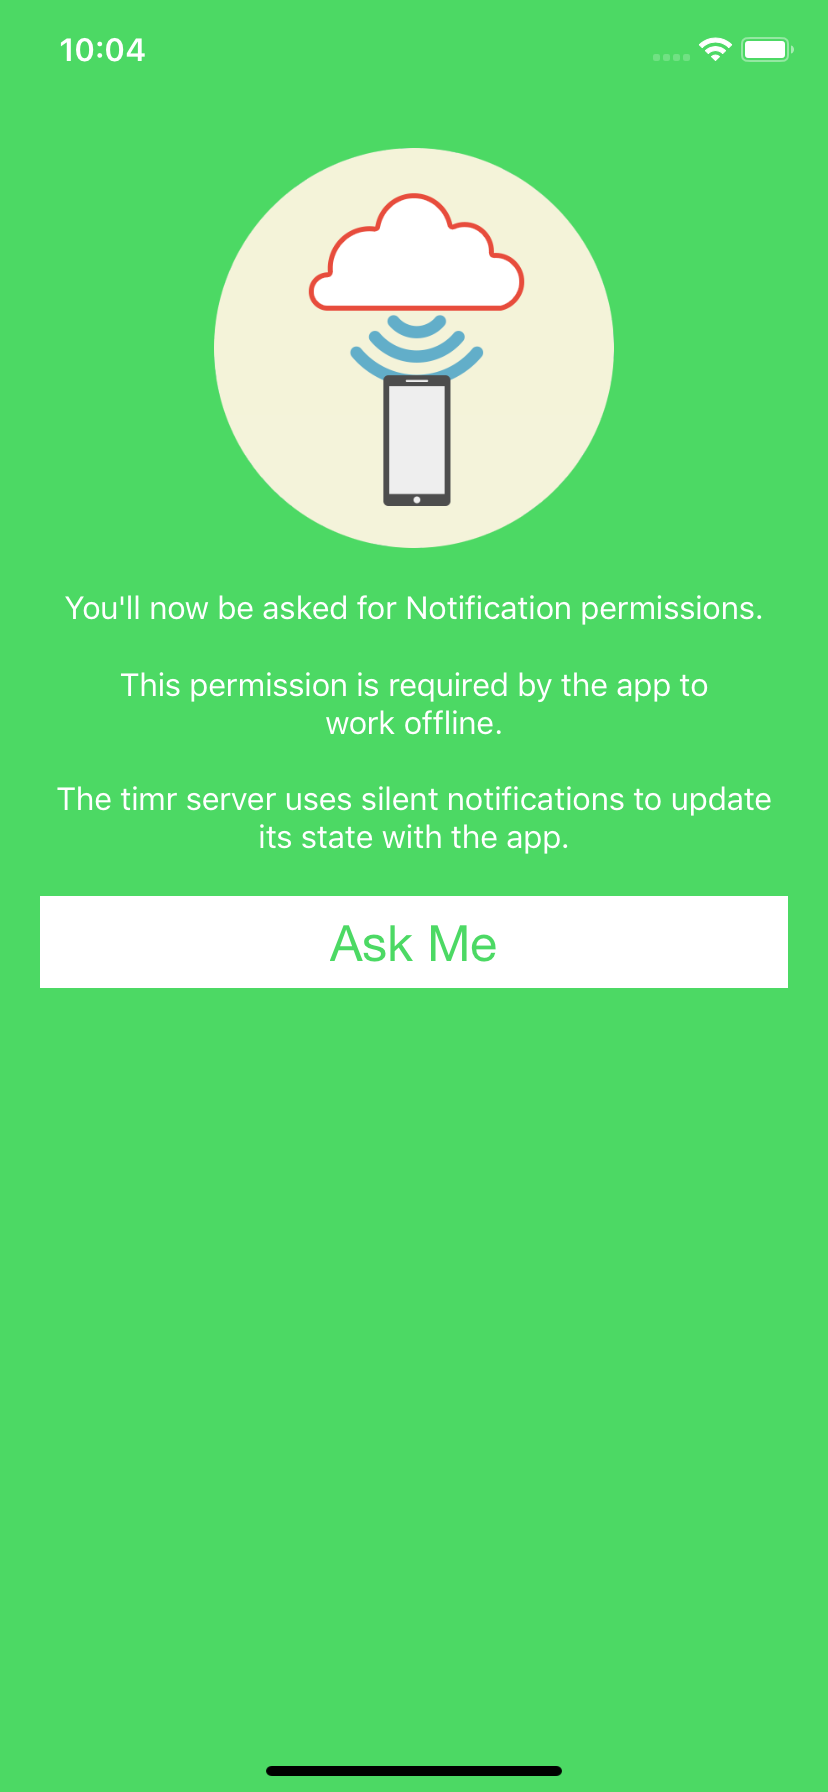
Notification permissions
Before starting timr you'll now firstly be asked for notification permissions.

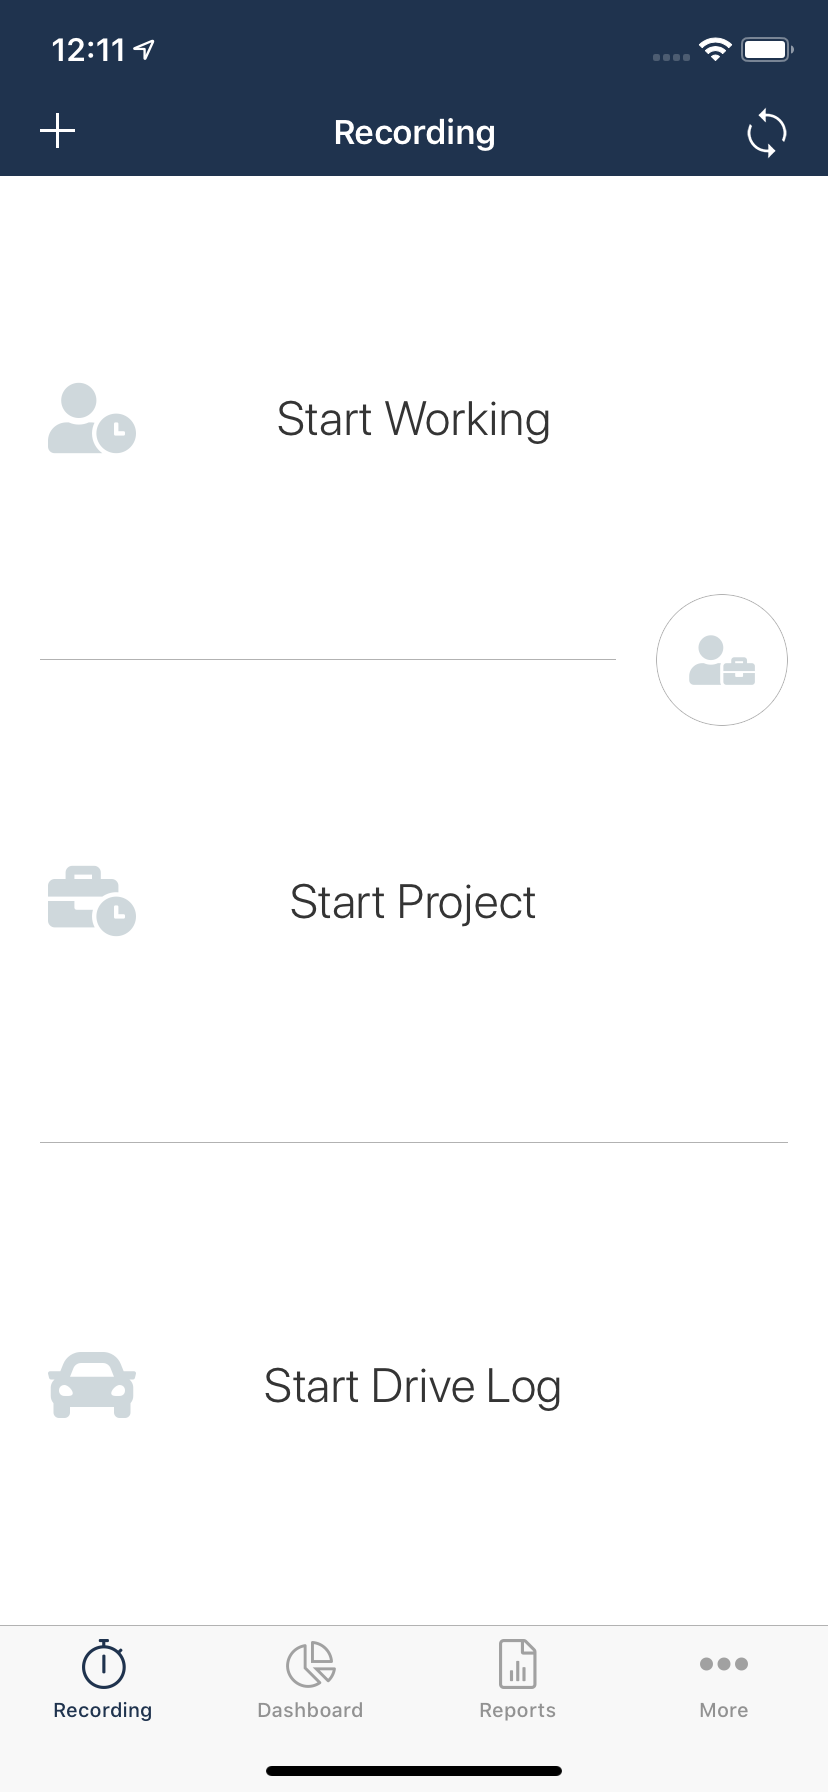
Now your timr App is ready for starting.
Comments
0 comments
Please sign in to leave a comment.